Searching The Village:
The German aircrew are hidden in one of six houses. The German player places a counter randomly numbered with one to six in each building. Roll a d6, whichever house has that number contains the German Aircrew. Until revealed the airmen cannot be given an order.
The British must pass an order test and spend a turn in the house they are searching (place a Down order on the unit)
German units find the crew automatically on the turn they move within 3" of the right house.
Airmen Escaping
As one of the airmen is wounded, the German airmen can normally only Advance. However, they may run if within 3" of a friendly unit. They must pass an order test to move even if they do not have any pin markers.
Winning the Game:
The game winner is whoever controls the film at the end of the game.
Moving the film:
The captain recognises the value of the film he possesses and will not relinquish it to anybody, unless he is dead.
Victory Conditions:
Change to "... the British play wins id the German aircrew is destroyed and the German commandos have not recovered the film.
Campaign Points:
The British gain 3 points if they are in possession of the film at the end of the battle. They again 1 point if the ari men are dead, but the film hasn't been recovered.
The Germans gain 3 points if they carry the film off the table, or 1 point if they have possession at the end.
So, again, I took four squads of Home Guard, and one small squad of Veteran Home Guard led by an officer. Terry took some Brandenburg assault squads, out on the hunt. I split my force in two, one on either flank, hoping to sweep to the centre and find the aircrew.
We began by rolling to determine which house the German Air Crew were hiding in, we rolled a dice and it was house number 1.
Turn 1:
The first dice pulled was mine, and I took the squad deployed on the left forward to the nearest house, hoping to find the Germans in there. I got the next dice and the Veterans advance forward along the road.

Terry got the next dice and brought on the first of his Brandenburg squads on the left flank. Whilst I then maneuvered the other squad on the left towards the center fo the board. Terry then got the next dice and brought on another squad.
I advanced another squad into the centre of the board, which was then matched by Terry bringing on his final squad towards the centre of the board. My officer moved to follow the veterans, whilst Terry's officer moved towards the centre of the table. The turn ended with the German aircrew doing their best to hide.
With the Germans using the disguise special rule, I was going to have to get close to see them, before I could then shoot at them. Turn 2, was going to be fun.
Turn 2:
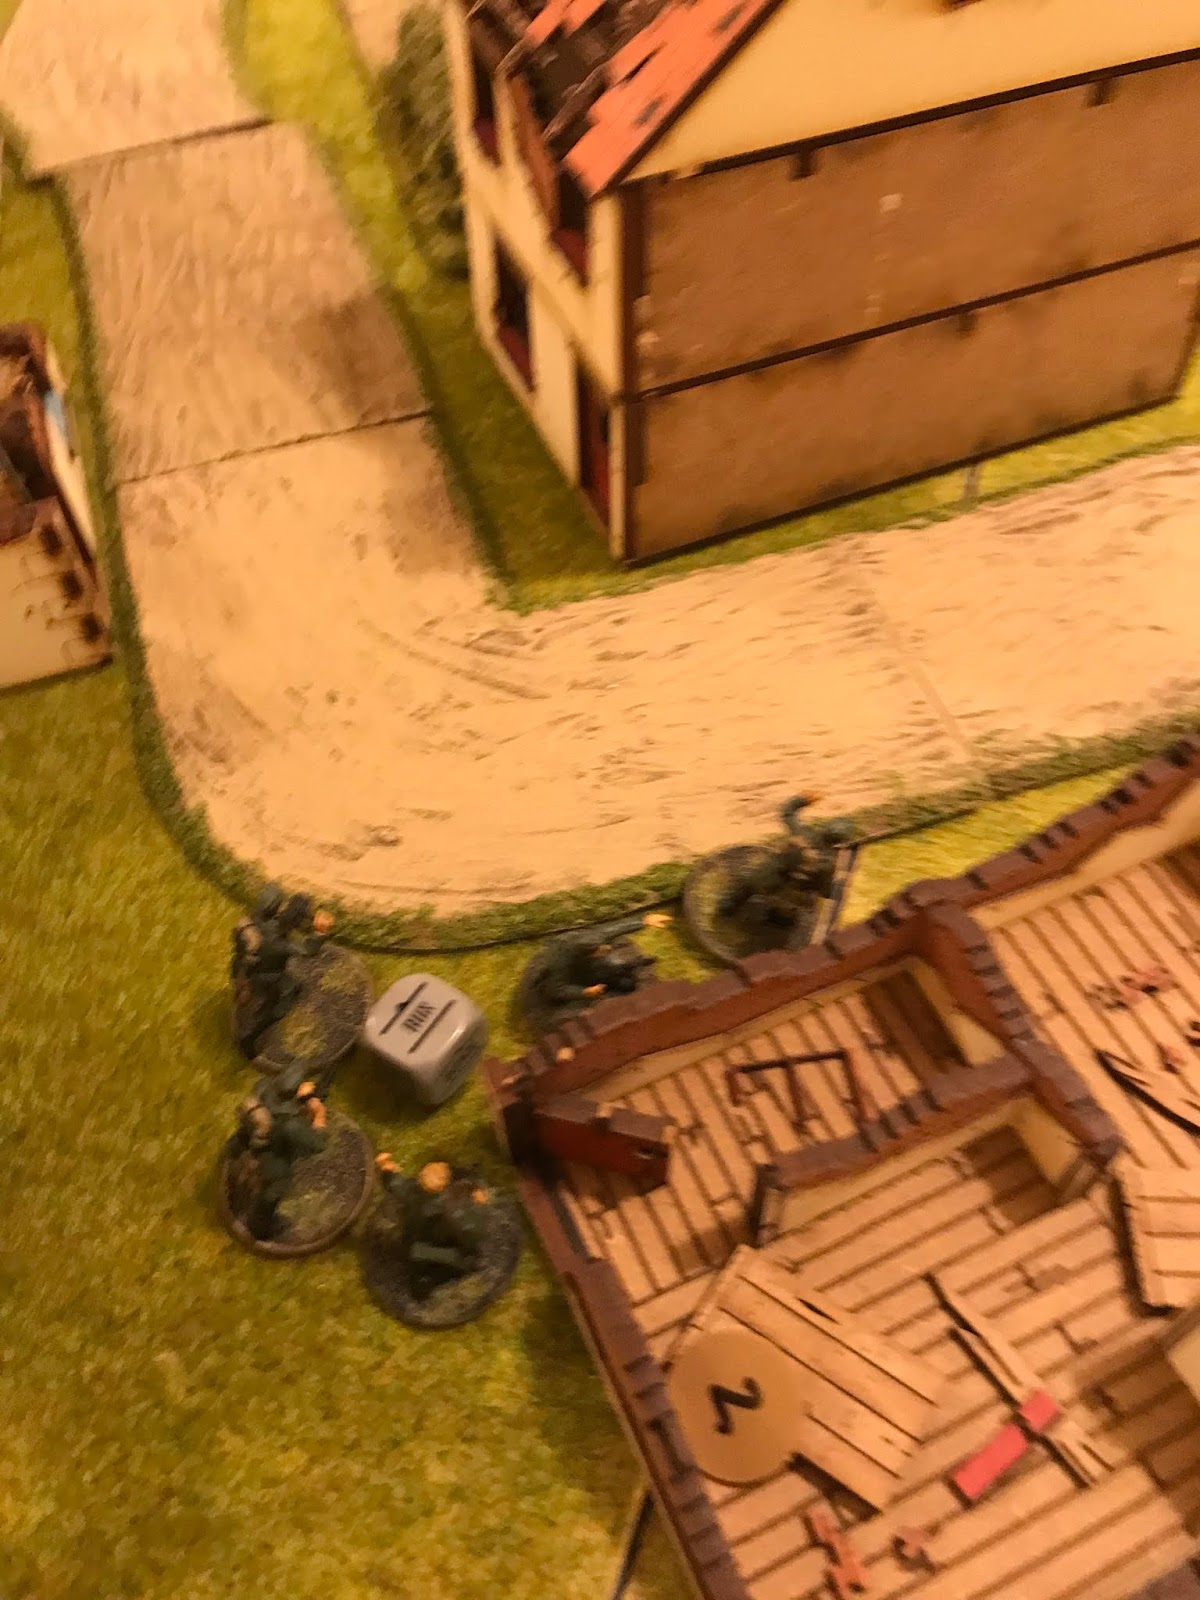
I got the first dice of the turn, and the second squad on the left searched the nearest building. I flipped the counter, it was 3. The aircrew were not in that building. Terry, then moved the Brandenburg squad on the left, to the nearest house flipping the counter, revealing a six. Two houses down, and no sign of the aircrew.
Terry's squad on the flank moved forward to the nearest house and flipped the counter, it was a 5. Three houses down. I then moved my other squad on the left, towards the nearest house and looked at the Germans, but because of the disguise rule, they gave a polite nod of the head and went about their busisness.
Terry's squad in the centre, advanced forward, and knocked on the door of the nearest house, and asked in their best german if the aircrew were in there. The counter said 2, and it was now clear there were two houses left for them to be hiding in.
I then advanced one of the squads on the right forward, hoping to get the house in the next turn. Meanwhile, Terry's officer moved forward and came into contact with a house. The counter was flipped, it was a 1. The Aircrew had been found, who then fled. The turn came to an end with my officer and the other right flank squad running forward hoping to catch up.
I was going to have to pull something out of the bag in the next turn to win this.
Turn 3:
 Terry got the first dice, and moved his officer backwards, linking up with the aircrew. I then advanced one of my squads forward, from the left flank, hoping to get a good line of sight and shoot them down.
 However, the Brandenburg squad in the centre got in the way, and though I was able to kill four of their number, including the NCO, and causing an extra pin with my officer, they passed their test and stayed on the board.
The next dice would determine the game, if it was mine, I might be able to cause the aircrew to go down, and so bring up the other forces to stop them.
It was Terry's and the aircrew fled off the board.
Though this had the same result as the last game, and in a similar time frame, I didn't mind so much as the random element was more fun, and it was just bad luck, for me, that Terry was able to find the squad at the end of the turn.
So, only one thing to do. Swap sides and play the scenario the other way around.
Looking at the board set up, I wanted to try and cover the right flank, more than the left. So, I'd be bringing on two squads on that side, with the officer. Then use the final squad on the left as bait.
Game 2 and the aircrew were in house number 2.
Turn 1:
 Terry got the first four dice, and so as there were no enemy on the board, he advanced forward three squads, plus the home guard veterans, hunting for aircrew. I then got the next two dice and deployed the commander and a squad of Brandenburgs on the right flank.
Terry then moved a squad through the gap in the middle of the table, and inbetween the ruins. I then geo the next few dice and I deployed the decoy squad on the left and brought in the final squad on the right, but a bit closer to the center than I should have done.
Terry's commander moved forward, rounding of the turn. Another quick turn, but forces were near houses and so it wouldn't be long before the German Aircrew was found.
Turn 2:
I got the first dice of the turn, and the decoy squad on the left moved forward and searched through the house. It was a 4, and so the air crew were still to find. I then moved my squad nearer the centre to a house, flipped the counter.
It was a 2.
I had found them on the second dice of the turn, it was going to be a different game. Seeing the aircrew appear, Terry advanced forward his squad on the left flank and opened fire on the nearby Brandenburg squad. He hit twice, but no casulties were caused. He then ran forward two squads, getting them as close to the enemy as possible.

Seeing the enemy approach, the officer ordered the other nearby Brandenburg squad forward and to open fire. The key was to get the aircrew out, everyone else was expendable. Not knowing this, they surged forward and killed two of Terry's second squad on the right.
Terry's veterans then advanced on the decoy Brandenburg squad. Terry's officer advanced forward, and I responded by my officer advancing forward and killing a further four of Terry's squad that had already been hit. Terry was then able to pass his moral test.
Speaking of Moral Tests. I got the next dice, and it was time to move the airmen crew, as per the special rules, I had to pass a morale test before they could move.
I failed and they went down. This was not going to be a quick game.
Terry then advanced his final squad towards the enemy. I was going to have to go on the offensive on the next turn if I was going to get the airmen out alive.
Turn 3:
I got the first dice of the turn and advance my squad in the centre forward, ending near the airmen. I opened fire and killed six of the nearest squad. Terry failed his morale test, much to my pleasure. Terry then tried to charge his wounded squad, but failed the moral test. On the left flank, the decoy squad spotted a target and killed six of there number. However, Terry was able to pass his moral test.
 I moved the squad on the right, towards the hedge and opened fire. I killed six of the squad, but again Terry was able to pass his moral test. Terry then advanced a squad towards the airmen and opened fire, but due to them being in the building still, they were fine. Terry then tried to move the squad on the left forward, and this time failed his morale test.
I moved my officer towards the airmen and with a quick order in German, the airman began their move towards the nearest table edge. Terry then tried to advance his final large squad, but they decided to go down.
Finally, his veterans charged into combat with the decoy squad. He killed four, and I killed none. WHAT!
That shouldn't have happened. As we both love a good narrative, we both agreed that the squad was not killed, but captured for a good interrogation. He then advanced them forward five inches.
I had gone on the offensive, but that last act by Terry could have swung the game in his favour.

Turn 4:
I got the first dice, and as my airmen were still near a friendly unit, they made their way to the nearest board edge. I got the following dice, and charged my squad in the centre into combat with Terry's commander, and killed seven out of the three men with no loss in return.
Terry's squad on the right tried to advance, but failed his order test, and so went down instead. The same happened in the centre, and his squad went down instead of charging my squad in the centre of the board. Finally, Terry then moved the Home Guard veterans forward.
I got the next dice, and the officer, and his men, fell back to make sure the Aircrew escaped with the film. Terry then tried to charge in against my squad in the centre. He was able to kill one, but I was able to hack four down in return, and wiped out the squad.
On the right, I charged the squad over the hedge, and killed five suffering no loss. I was able to consolidate a mighty one inch.
So, this turn went okay, and as long as I get the next dice, the airmen are off the board.
Turn 5:
Terry gets the first dice and the Home Guard veterans charge into combat with the aircrew. Not good, but as they were over six inches away, I could shoot. Doing so, saw three of them die before making it into combat.
Terry, was able to kill one of the aircrew, but I then wiped out the remaining members of the squad, and consolidated of the board for an easy win.

So, identical results, the Germans got the film, but two very different game. Yes, the first game was similar to when we played the scenario with the rules as written, but it was more fun, as you didn't know which house the Germans were in. It was just unfortuante that it was near the end of the turn when they were revealed.
So, another three campaign points to Terry and myself. Next up a 1000 points capture a port game.


