Thursday, 18 April 2019

5th Column Raid

After two scenarios with the Germans trying to land on the beaches of Kent, this next scenario, the third in the Operation Sealion book, takes us as the 5th column rise up and try and steal the keys to the local armoury from under the keys of the local Home Guard officer who was busy with his lover.
Possibly my fav board to play on. 

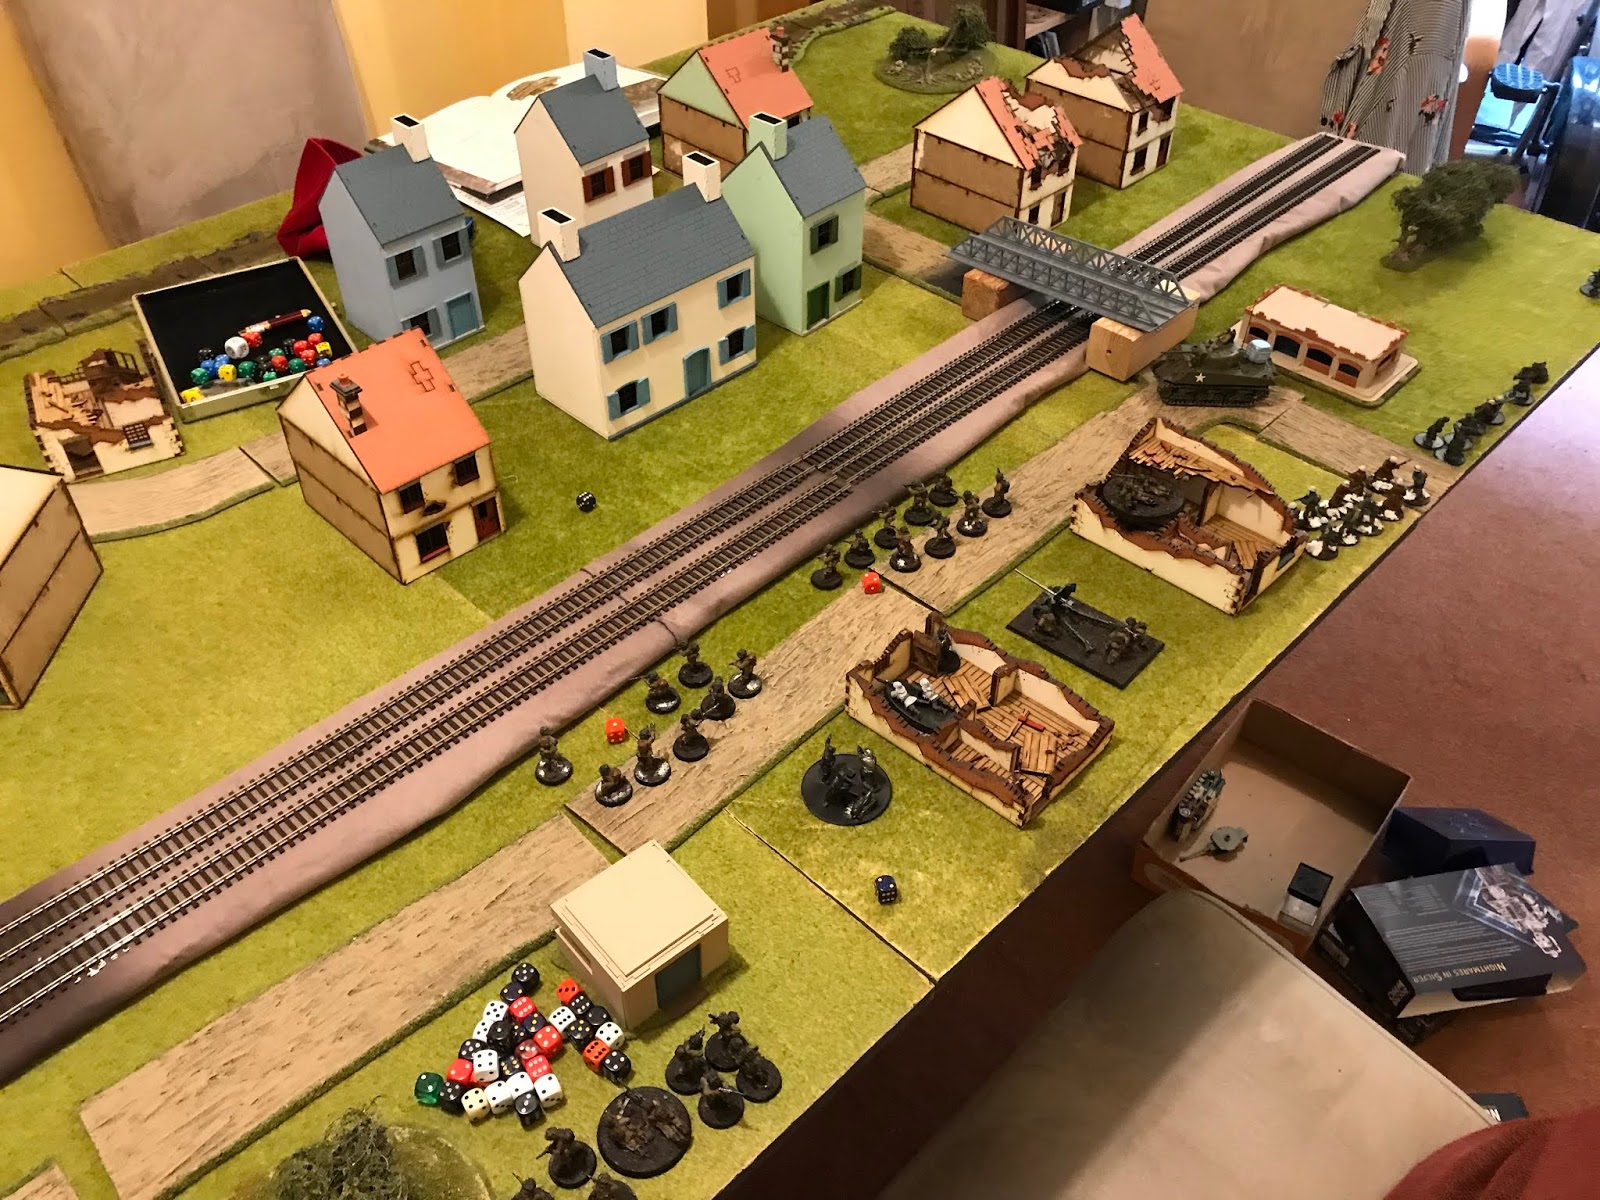
Terry had arranged a lovely looking table, and I brought my growing collection of British Expedition Force. I had an officer, 4 squads of inexperienced troops, a smaller Home Guard Squad, and a single MMG team in 500 points. Not knowing where Terry's forces were going to appear on, I deployed my squads in four corners and set up the MMG in a place to cover the square.
Oh what a lovely lady.

Turn 1:
The game began and the first dice and the following 9 dice went to Terry. Using this advantage Terry brought on a small squad of 6 Columnist and shot at the the squad in the North West area of the board giving them a pin.

Waiting for the 5th Columnist
Terry then brought on a Spy, moving towards the house where the British officer was having an enjoyable time with his lover. Two more squads came in on the North West and North East corners of the board. A man was killed in the North West squad, and the squad in the North East lost a man carrying the Lewis gun.

In the middle of the board, a squad of armed and dangerous ladies came charging in towards the village square. Terry finally finished up his run on dice with bringing on some officers, and a light mortar and an anti-tank gun.

Finally, it was my turn, the wounded squad in the North East, tried to shoot but failed their order check. Not a great start to my turn. In the south-east, the squad advanced towards the charging ladies and killed two of their number. Whilst the MMG began to prepare an ambush, the squad in the south-west moved towards the centre, hoping they could raise their officer.

Meanwhile, as the turn came to the conclusion, Terry brings on two more squads, each with ten columnists in the squad, giving more muscle and firepower for Terry.

Turn 2:
Terry, began this turn, as he did the last and gained the first dice. His squad charges against my north-wast squad and killed 2, in return, I killed 5 and wiped out the squad. Boyed by this, I charged the ladies with the Squad in the south-east and wiped them out.

Funny looking sisters
Terry's mortar dropped a shell on the squad in the North-East killing two and adding two pins. This squad tried to charge a nearby 5th columnist unit but failing their morale check. Meanwhile, the Home Guard squad shot at the nearby big 5th man columnist squad, killing one of their number.

Terry charged one of his smaller units, and charged the North-East squad and wiped them out, before consolidating them towards the centre of the table. Terry then advanced forwards both of his big squads towards the centre of the table. His smaller squad took a pot shot at the squad in the North-West and killed two of them. This squad then went down, after failing their morale check.

In the South-West, the squad advance and took aim at the ten-man squad and added a pin. Meanwhile, pulling another dice for Terry, he charged the squad in the North-West and wiped them out.

As the turn drew to a close, Terry's officer passed his test and was able to wipe out another member of the Home Guard man. His Abweragent moved towards the centre and revealed himself and killed one of the South-West squad.

Finally, the turn ended with the MMG moving into a better position.

Turn 3:
Terry began his turn by trying to charge his ten-man 5th columnist unit forward, hoping to take the officer, by surprise. Thankfully, for me, they failed his test and the squad went down instead. However, Terry got the second dice of the turn and another squad charged forward and enter the building, taking the officer by surprise and killed him. Terry now had the keys to the armoury and I had to do something about this.

To do this, I charged the south-west squad into the building, to retrieve the keys. I killed six of Terry's men, only losing three in return. I had won the combat, and more importantly, I've got the keys.

Meanwhile, Terry's officer took another member of the Home Guard unit out, leaving two of them behind. In response, the Home Guard charged the officer and wiped him, and his two men, out. Terry shoots at the south-east squad and wiped out another 3 of them. His mortar then tried to add to the damage, but failed to hit.

In the centre, the South-East squad charged forward and wiped out 5 of the ten-man squad out. Terry then responded in kind and killed 5 in return. Fighting an immediate second round of combat was a bad idea for me, as I failed to kill any of Terry's men, and he killed two.

Terry then got a run of his dice being pulled and was able to move his officer, spy, and another of the squad to the centre of the board. My officer tried to shoot at the spy but failed to hit. The turn came to an end with the MMG going on ambush again, and Terry moved his anti-tank gun towards the Home Guard squad.

Turn 4:
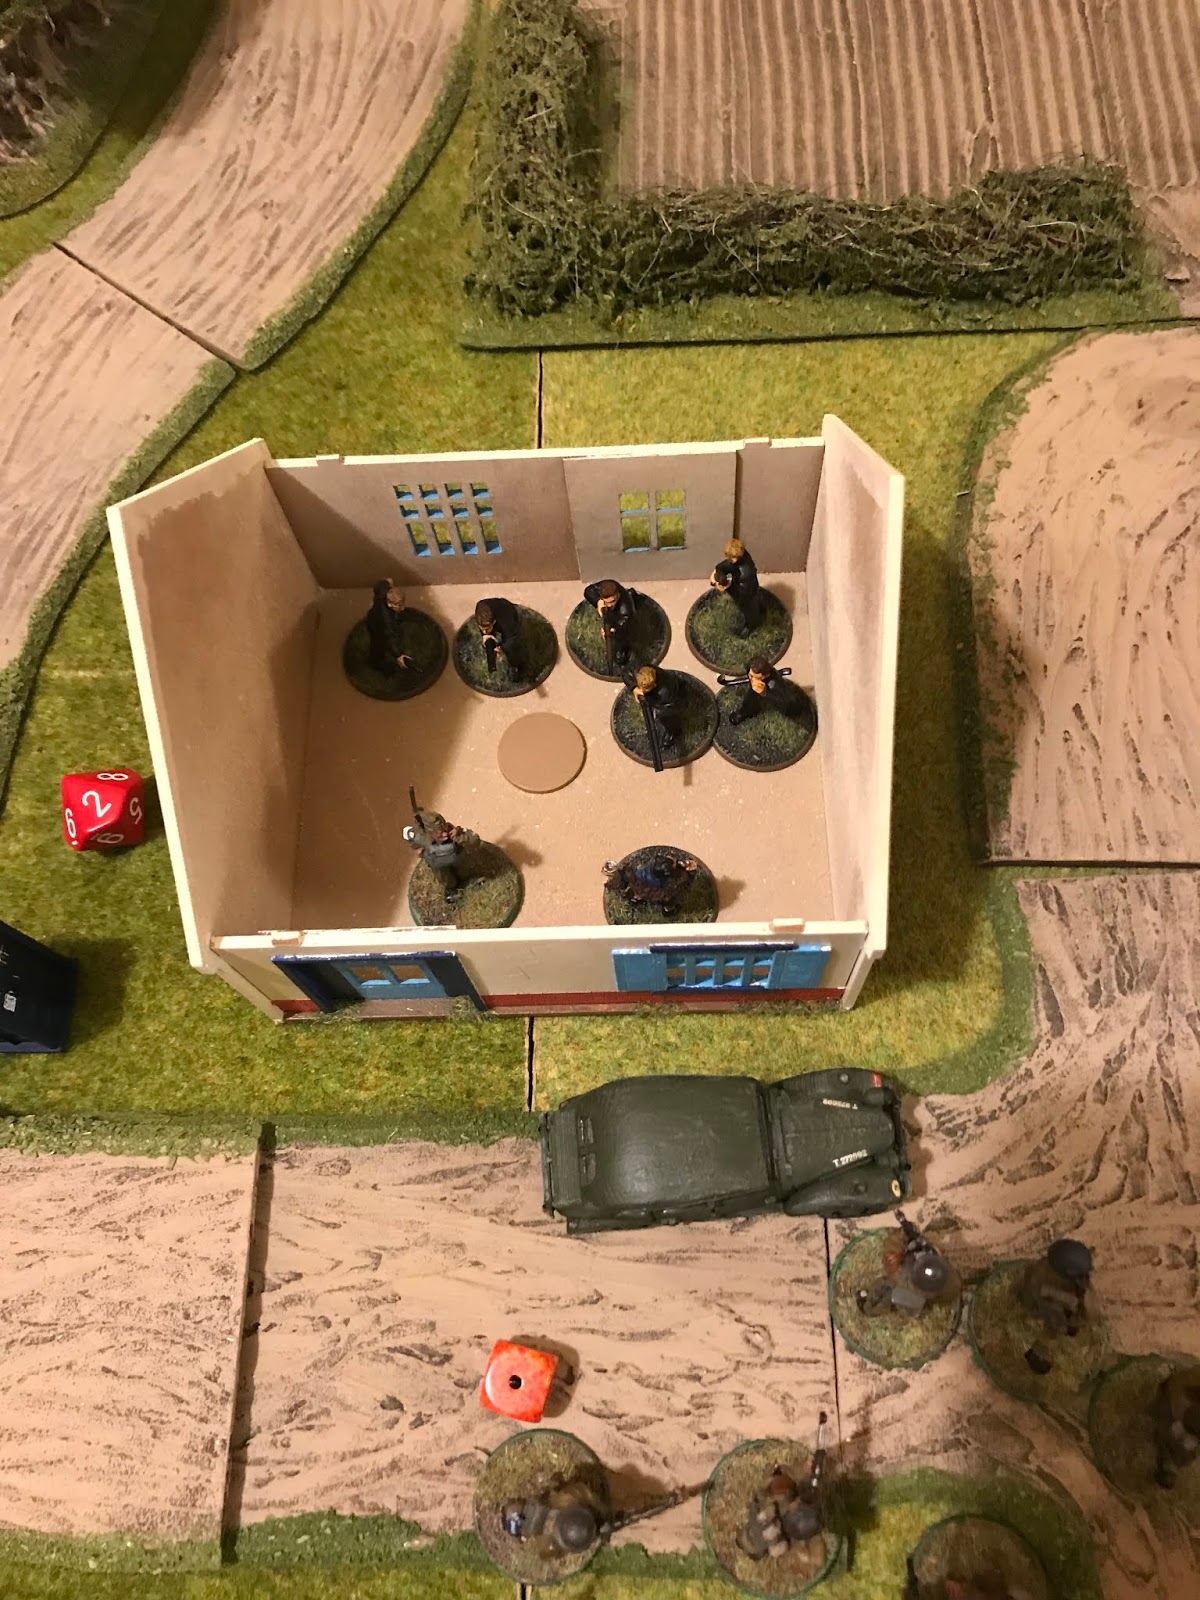
Suprise.
Having got the keys, I need the first dice to make sure they moved away from the centre building and off the board. Off course, the first dice pulled was Terry. He tried to charge the squad in the building, and retrieve the keys, but he failed his order test.

Thankfully, the second dice was mine, and I moved the keys off towards the nearest board edge. The third dice was mine, and I was able to charge the Anti Tank gun with the surviving Home guard members, wiping it out.

However, Terry was then able to charge the squad with the keys and killed three. I only killed one in return and Terry was able to retrieve the keys. With a good dice roll, Terry was able to advance five inches towards the board edge.

With the last squad being wiped out, my officer, leading my example, charged in and killed one before being cut down. This left me with the MMG, which I needed to use to kill Terry's squad in Turn 5.
Last man standing

Turn 5:
The first dice was, once again, Terry's and he used it to advance the squad into contact with his spy. Needing the second dice, so that I could shoot with my one unit, I pulled one of Terry's dice, and the spy was off the board with the keys, and the win.

Terry had won.

This was a great game, with the keys going back and forth and being quite tense. My only issue, looking back at the forces I used, was how I set up the MMG, with a good spot covering the square, I thought it was going to be a useful deterrant. However, it turned out to be a bad spot.

Terry and I both agreed that this game, and the soon to be written up replay with Terry as the British and myself as the 5th columnist have been ideal for us. We are both Narrative players and this was the perfect scenario for us.

Onto the next game.

Monday, 15 April 2019

We will fight them on the beaches.

It's been a while, but a busy March which saw travel to Rome with work has delayed the write up of the next few scenarios. With my German force storming the beaches of Kent in the previous game, it was time for Terry to try and win the shores of Britain.

To stop him, I bought a solid force of 4 squads of BEF, a few artillery pieces and support teams,  a squad of the Navy finest men backed up with those Home Guard veterans. A nice 1000 point force. I spread my troops over the table, hoping that they will be enough to stop the German forces. I decided against any reinforcements and went all in.

Don't Panic.
The game started with Terry launching a bombardment from the Naval ships just off the coast and he did a lot of damage. Lots of squads received 2 pin markers and worse 6 of the Navy squad were wiped out.

Turn 1:
Turn 1 began with Terry receiving the first dice of the game and bringing on the first of his small boats. My Home Guard squad seeing this arrival, passed thier moral check and missed the boat. The officer could be heard muttering about missing a barn door. Despite this hail of fire, Terry received another dice and jumped a squad out of the boat, who returned fire on the Home Guard squad, killing one of there number.

Dead before it could do anything. 
Nestled in some undergrowth the British Sniper shot at the squad and gave them a pin marker. Meanwhile, more enemey reinforcements were arriving, as a German Tank was seen swimming it's way through the tide only to become some stuck on an underground reef or sandbank. This was good for the morale of the British.

However, a second Panzer, a Swimpanzer no less quickly came on and wipped out the Smith Gun, without it being able to let off a shot. The Mortor, dispirited by seeing their freinds wipped out, failed to hit the squad on the beach front.

As the Navy squad rallied, from their pregame mauling Terry was able to bring on more boats woth squads jumping out and running up the beach. Terry's Pioneer Squad ran forward and shot the Home Guard, killing another one of their number.

At this point, Terry had a sucession of dice, and soon the beaches of Kent were littered with German boats and the sounds of Germans taking up postions. One of their squads, charging up the German right flank suddenly found themselves in ambush from a British squad and lost one of their number to the gunfire. In return, they targeted the hidden sniper and gave him a pin.

As the turn came to a conclusion, the Germans had gained a foot hold, and cemeted this with the invasion barge came crashing into the beach head.

Turn 2:

Terry tried to advance his squad on the right forward, but losing a man in the previous turn had spooked them and they decided to hunker down where they were instead. I managed to land a mortor shell on the boat, but no damage was done, but it did receive a pin which was spread to all of the squads within.

My squad on the German left flank advance forward and opened fire on the dastardly German flamethrower. Somehow, despite the hail of bullets, the Germans survived and then in return wiped out the squad.

Fill the gap.
The Swimpanzer continued it's march forward and let rip at the second right hand squad of British, who decided to go down and suffered no casulties. Terry's other Panzer still remained stuck in the mud.

The rest of the turn was spent repostioning squads for the British, as the hole in the right flank caused by the sudden incineration of the British Squad was opened up by a charging squad out of the Invasion Barge. The only casulty was Terry's squad on the right hand flank took another casulty.

Turn 3:

This turn opened with Terry charging a squad into combat with the sniper, who, predictably, disappered under a hail of combat. Terry used his Swimpanzer to shoot at my officer, who somehow managed to survive under the hail of bullets.

Meanwhile, boyed with landing on British soil, Terry's squad that had apepared out of the boat moved forward and wipped out the oppoising NCO and LMG of the nearby squad. The squad tried to charge them, but failing thier morale check, decided to stay where they were. My nearby MMG opened fire on the Germans and killed 2.

Terry's Pioneers advanced on the mauled Navy squad and killed one more of thier number. In response, and with a blood curdling scream, they responded by charging into combat and wipping out the Pioneer squad.

Terry bought on his officer, to join the men on the beaches, and was suprised to find that one of his tanks was still stuck on the sand bank. Ignoring this, the German forces were ordered to move forward, and were soon making thier way across and into the English country side.

Things were looking bad for the British, most of the squads had pin markers on, as well as losing several men.

Where did that come from.....
Turn 4:
Turn 4 did not start of with Terry's mortor landing a shell on one of my squads, which killed 4, and sent them fleeing. As Terry, now seeing a big hole in the British flank, began moving his forces forward at a run, I charged into Terry's other pioneer squad and wipe them out.

Only to loose the squad to the flamethrower that appeared from nowhere to me. At this point, I knew Terry had the upper hand especially, as his previously beached Tank, sprang forward. The only consilation that this turn had for me was, that I was able to wipe out one of Terry's squad with the Machine Gun, but as the game came to a close, I knew that I had lost the game.

Turn 5:
This turn starts of well, and my mortor lands a shell on Terry's tank, exploding it. The cheer from the badly mauled British side was short lived as their officer was enveloped in a hail of flame. His adjuandt died, but the officer step clear with nothing more than some singes on his trousers. The evil flamethrower had to die, and a squad were sent to to deal with this and it was soon wiped out.

Meanwhile, the rest of the turn saw Terry move his forces forward and get closer to the edge of the table. Knowing there was nothing that I could do to stop them we moved on to turn 6, which might be the last of the game.

Turn 6:
2" letting rip.
Terry's 2" artilery peice aimed at my squad and killed 7 of them in one explosive blast. This turn had not started out great for me, and it would continue to get worse as Terry was able to get squads of the edge of the board, gaining him campaign points in the process.

Meanwhile, the only thing of note from my perspective was that my mortor failed misserabley to hit the tank, let alone damaging it. And my last surviving squad deciding that cowardace was the best option and going down instead of charging into combat.

There was only one thing left to do, and that was to role the dice to see if another turn would be played. I hoped for an end, but the dice came up and said one more turn.

Turn 7:
Right, next stop London.
With the dice saying we had to play one more turn, and the writing, at this point being fairly on the wall, but being British, we would not go down without a fight. I targeted Terry's mortor with my last squad and was able to wipe it out. However, in response they became the target of Terry's 2" artillery and wipe out the squad.

Despite giving it all they could, Terry's tank was not able to get off the table denying him some more victory points. Instead, they targeted my mortor, and killed one of them. I in response, aimed the mortor at his 2" and killed it.

At this point the game was over, and it was time to count up victory points.

David 10 Terry 28.

Terry had well and truely deserved this game. I think I selected my forces poorly, it was done in a rush, and didn't really go with the scenario. I also think, with hindsight, that I should have taken an Anti Tank Gun, and maybe deploy some force in support, to have as reinforcements.

Terry, was able to exploit my weakness perfectly, and break through the thin British line, perfectly. Gaining him 13 campaign points to my 0.

After 4 games, and 2 sceanrios, the campaign points are like this.

Terry 19 David 13

And also Axis 23, Allies 9.

Terry,'s taken quite a lead, and lets hope I can claw it back in the next few sceariors.

Monday, 11 February 2019

On the beaches of Kent

So, after some intials forrays, it's time to let the dogs of war slip and for the Germans to storm the beaches of Kent.

For this, Terry and I, agreed that we would not pay the point costs of the German assault barges and the 1000points could be spent on troops to raid the cost. So with this in mind, I brought with me six 10 man squads, a couple of MMG's. A flameflower for any pesky bunkers we might find. A single Brandenburg Assault squad with as many SMG's as they can carry all led by an officer.

British Men doing thier duty, defending the country
The obejective, for the Germans was to get a foothold, and if possible, get of the board. The latter was a tough job, but with as many squads as I can take, I might be in with a change.

Terry deployed a few Home Guad squards, backed up with a Northover projecter and a Smith Gun on the coast line, with a Anti Tank Gun and a MMG hidden in the depths of the English countryside.

The naval guns let rip, and a prepartory bombardment hit the English defenders before turn 1. All units took a variety of pin markers, with the Northover projector taking a casulty.

Turn 1:
With the first dice being pulled, (it did help I had 15 dice in the bag), the first German barge arrived and began to lower the ramps. Spotting the enemy the Northover Projecteror opened fire, but missed the bulky ship. Shouts of not being able to hit a barn door were heard floating over the English coastline.

The invasion happens
Meanwhile, on the German left flank, a looted barge, from the Dunkirk debacle, crashed into the shore. All the while, Terry took the opportunnity to rally some of his pin markers off, except for a Home Guard Squad that decided to go down instead.

With the first turn, nearly over, two boats mortered in between the bulky barges, and disembarked a Banrdenburg squad, a flamethrower and the commander, leading the assault from the front.

Turn 2:
Again, the first dice was mine, and I ran forward the first German squad(known now on as R1(from now on I'll designate the squad as L or R for which side of the battlefield, and 1,2, or 3, for the order they came in on)), on the right flank, landed on English soil. Terry opened fire with his Smith Gun, hitting the boat and causing a might three pin makers.

Anyone know where Butlins is?
Meanwhile, a squad (known as L1) jumped to shore, and wipped out the Northover projector from the battlefield. In the centre of the battlefield, Terry's Homeguard squad rallied and killed one of the Brandenburg squad, charging up the centre.

Meanwhile, at the rear, Terry's reinforcements began to arrive. Several squads of the BEF finest arrived bringing with them a squad of the Navy's finest. Worse, for the Germans, they were backed up by a Hornet tank, rumbling it's way through the English countryside. Bristling with five machine guns, this was quite a terryifying prospect, as well as being mentally added to the list of models I want to get.

The final act of the turn, was for me to remove all of the pin markers, that the barge on my right had picked up. It felt very weird rallying a boat, but it had picked up four pin markers which would carry on to the squads about to disembark, so it was the right move to make.

Turn 3:
Caught drinking tea.
Again, I recieve the first dice of the turn, and I move R1 forward, taking out the Smith Gun out. The two biggest threats to my invasion barges had been removed. In the centre of the board, the Brandenburg Assault squad move forward, and reduce the Home Guard squad, that had dare to wound it in the previous turn, to one man who decided to stay put.

Terry, in response, advanced the Hornet forward. That was the plan, but overcome by the Carbon Monoxide fumes, the driver slipped into reverse and moved away from the enemy.

On the left, Squad L1 moved forward, and reduced the nearby Home Guard squad by two men. The Home Guard were resolute and stayed put, kowing that there was a squad of the Nave finest nearby. Meanwhile, the Flamethrower, spying the enemy commander standing watching his men drinking tea (Terry's officer's assistant was modelled drinking a cuppa) and opened fire, incinerating the two men.

The Home Guard squad, horrified by seeing thier officer turned to ashes, fired at Squad R1, and killed a man.

The coastal front was now a lot opening, the Germans had a foothold on the beaches as squads R2 and L2 jumped out of the boats and advanced forward as the BEF scrambled forward to stop them.

Turn 4:
Nearly made it
Squad R1, seeing the enemy rushing through the undergrowth, opened fire and killed four men. The flamethrower, ran forward, and opened fire wipping out the recently arrived BEF squad, on the left flank.

That would have been the plan, but boyed with thier success the flamethrower failed to notice the MMG inside the pill box, sitting on Ambush, and were cut down in a hail of bullets. Terry had a MMG mounted on a quad bike contracption, which I can't remember the name of. It opened fire, and took out two more of the Brandeburg assault squad.

On the left flank, Squad L1 took out three more men of the Home Guard squad they were facing, but then came under fire from the Navy squad, that had now arrived in. They wethered a large number of hits, but were still there.

The Hornet slipped off backwards once again, much to my relief. However, the BEF squad, then added fire to L1, taking out 3 more men. In response Squad L2, charged forward, and killed three of the Navy squad.

Terry's Anti Tank Gun, had spent the previous three turns trying to hit the Barn Door shapped Barge, but had decided to shoot at Squad R1, killing a man. The Light Mortor, finally finding a decent firing spot, hit the recently arrived Squad R3 but missed the moving target.

The turn, came to an end, as in the centre of the board, the lone Home Guard surviour, assaulted the German commander, and killed his assisstant, before being killed in return.

Things were starting to look bleak as all seven of my squads were now on English soil.

Turn 5:

The remainder of SquadL1 charged forward, hoping to wipe out the Navy squad. I knew this was a sucide mission, as it was a seven on four match up. It could be a glorious moment, until I rolled my dice, and killed 1. The squad was duly wipped out, and Terry retreated his Navy squad into nearby cover.

Squad L2 came under heavy fire, and elected to spend the turn, down, causing them to lose only one man, which was annoyingly, the man with the LMG. The Brandenburg squad, over in the middle, advanced on the Quadbike MMG, and caused one hit, doing no damage.

Over, on the right the BEF squad charge the damaged Squad R1, and killed two men. Impressivly, Squad R1 fought back, and wipped out the BEF squad in combat. Meanwhile, the quadbike then wipes out the Brandenburg squad, causing the surviours to flee back to the coast.

The Hornet finally moved forward, and the driver gunned the engines, hoping to make up for lost ground. Meanwhile the final units disembark from the boats, and a MMG arrive on either side of the boats (Being LMMG and RMMG respectivley)

The Navy squad and the MMG opened fire on targets, but were unable to wound anyone.

Time for the final turn.

Turn 6:
As the final turn began, it was clear that a German win was the likely outcome, could Terry stall the German advance, or would the Germans push forward.

L3 advancing under a hail of fire.
The LMMG opened fire on the navy, and failed to kill anyone. The final advancing BEF squad, move towards the centre, but fail to damage L3, who elect to go down.

Squad R3 charge, and wipe out, the quad bike. The key to killing vehicles, is charging them with a full squad. Meanwhile, the BEF MMG takes out three of Squad R1, causing them to flee.

The Hornet moved forward again, and much to Terry's pleasure, it opened fire as L2, who went down, but still lost two men who were not quick enough. The Navy squad added to the fire, and killed two more of L2, who remained strong.

The rest of my squads advanced forward, and after three and a half hours, the game came to an end.

The final score,

Terry: 8 David 22

So, I win by 14 victory points, and take 10 campaign points. Terry, meanwhile get's a further 3 campaign points for stopping my forces from getting of the board.

Terry was unucky with his dice rolls for the Hornet. The 5 mmg's would have paid a heavy toll on my forces. He was also, unlucky to lose both of his artillery pieces quite early on in the game. It could have been a different story, if they kept adding pin markers to the barges, which would have been passed on to the disembarking boats.

If I were to play this game again, I would think about taking some infantry squads in Hanomags, to get them off the board quicker. Now, all I need to think about is how to defend the English coast.


Sunday, 3 February 2019

Operation Sea Lion: Scenario One - the rematch

So, time for the rematch. 

After a week of pondering about how I was going to take the British HQ, I decided to go for a different force to the one that Terry used last week. I took two assault squads, one 5 man and the other 6. Similarly to Terry, they were all armed with SMGs, but also carrying a little explosive powder as well. Unlike the Saboteurs, they need a 6+ to destroy the HQ, but one or two extra chances is good.

A very pretty table to play on.
They were backed up by two saboteurs squads, and an infiltrator dressed in his best English Uniform and home knitted scarf, he’d be sent off infiltrating into the Kent countryside, and if need be, he would have a chance to explode the HQ as well.

I didn’t have much of a game plan, going into the battle, but seeing Terry deploy his forces on to the table helped me. I was facing two Home Guard Units, and a MMG. I was going to send my two squads to deal with the Home Guard, and hope that my infiltrators could sneak past the MMG and blow up the HQ.

Turn 1:
I pulled out the early dice, and my boats came to shore, two squads disembarked on my left flank, and headed up the boat, hoping to get in and disrupt the inexperienced Home Guard. 

Terry, had wisely put one of his squads onto ambush, but how does this resolve with the night fighting rules, which, dictate how far you can see in any given moment. After a gentlemanly discussion, we decided to allow it, but to interpret the rules, thusly.

A unit can go on over watch, when a unit moves into line of sight, it rolls 2D6, as per the night fighting rules. If they can see the unit, they can shoot, if not they just imagined the sound of someone walking on the beach. 

Survivng, for the moment
However, Terry was able to see, and put a pin marker on one of my units. However, worse was to happen. Activating his squad in the model, he opened fire, and my five man squad disappeared in a hail of bullets. Things were not looking to good.

However, on the right side the Infiltration agent had slipped in, unnoticed by the MMG team, and then the officer and one of the Saboteur squads crept forward and opened fire, causing two hit markers and two wounds. Terry, somehow passed his test, and it was left for my final saboteur squad to run up the beach, as a man ran to the phone box to ring for reinforcements.

The Germans are here. 
Turn 2:
With a roll of a six, the sun burst over the beaches of Kent, revealing to the stoic British defenders, the forces of the Germans infront of them. 

Pulling the first dice, Terry elected to open fire with the MMG on the infiltrating Germans, however a failed order later, the MMG went down. Only to be caught in a hail of bullets from the German Officer.

The six man squad on the left, in an act of retribution, and to bring them closer to the objective, moved towards the ten man squad in the centre, and opened fire with their SMG’s, killing 5 men. The squad, being new to this soldering, bottled their order test and fled. Leaving a big hole in the middle of Terry’s centre. 

However, the squad on the right, though diminished from fire in the previous turn, opened fire on the six man squad, and killed one of them. 

Meanwhile, on the right flank the infiltratrors headed towards the objective. As the turn came to a close, the first of Terry’s reinforcement’s came on to the board, and a single squad made their way to defend the beach. 

Turn 3: 
In a clever move, I was going to charge my five man squad into Terry’s remaining Home Guard unit, wipe them out in combat. Then I’d use their free move to bring them into touch with the objective and blow it up in the next turn.

It would have been fantastic, until I failed the order roll on a double 6. FUBAR, my battle plan was ruined and the squad ran off to paddle in the sea. 

Meanwhile on the right flank, Terry’s dice came out allowing him to advance his squad forward with the aim to wipe them off the face of the earth. However, combining the squad going down, and being a small unit, Terry was only able to put a single hit marker on, they both lived.

Boyed on by this success, the other saboteur squad charged forward, and made it into contact with the HQ. This was a game winning move.

Or it would have been if it were not for the home guard squad who charged in and wiped them out in comat.

The game was pretty much over by this point, but as turn 3, the infiltrator, dressed in his nice English Uniform and his scarf, disappeared into the undergrowth and into the English Country side, only stopping to salute the British Officer running to the front line. 
Hum... these English holidays' are no fun.

Turn 4: 
Terry, took the initive this turn, and the Saboteur squad holded up between the fortificatons were quickly mowen down by the English Regualrs in a round of combat. The German Commander, who was just contemplating which boat was quicker to get to was then cut down by the Home Guard unit.

Meanwhile, Terry’s final squad finally came onto the field to find out what all this fuss was about

My final squad, decided that escape was a better part of valour and with a final shout of “we’ll be back” disappeared back into the channel.

Final Score

Terry: 8 vicotry points David: 2 Victory points.

This was a remarkably quick game, over within an hour and a half, and fair play to Terry, the dice were in his favour and he fully deserves the 3 campaign points he took. 

There were two moments, that defined the battle., Firstly, my losing the squad in the middle of the table, on turn 1. That had a major impact on the battle. Secondly, failing my order test and FUBARing, with my other squad, who ran back to the boats. If it wasn’t for these two, I could have won this game.

At least, that’s what I keep telling myself.

You’ll notice that the Infiltration Agent crept off into the undergrowth at the end of turn 3, Terry and I decided, that this would be a good idea to add an additional thematic element to the campaign 
We'll be back
and so t
his whole raid was actually a roose, to get him into England, and we agreed that in one of our future games, he’ll make a reappearance on the German side. 

If I remember him.

Next week, Hitler’s forces descended upon the beaches. 

Sunday, 27 January 2019

Operation Sea Lion Scenario 1

"Put that light out."

Scenario 1: Brandenburg Costal Raid

I blame Band of Brothers for this
Throughout 2018, Terry and myself had worked our way through the Battle of the Bulge scenarios. With the US forces having successfully broken out of the German pocket, our thoughts turned to what’s next. 

Operation Sealion.

Hitler’s plan to invade Britain. Something, he never put into action, but it’ll be good fun to see what if. So, after some planning, watching Dad’s Army (mainly on my part) and a bit of painting we gathered together to play the first scenario, Brandenburg Costal Raid. 
Walmington on Sea's finest

Terry and I had a discussion and we decided to add a bit of flavour to this scenario and we were going to add the night fighting rules. Our thinking was clear. It’s late in the night, the sun is close to rising, when the German’s attack is launched. 

The objective for the Germans was to destroy the British HQ, a lovely British cottage, with a beautiful sea view. The Brits had to stop them. I knew I was taking the British Forces, and having read through the scenario I decided the key to my success, will be having as many men on the board as I can.

So, three 10 man squads, a smaller 5 man home guard squad, made up of the Dad’s army soldiers, a MMG, and a officer and his man (Captain Mainwearing and Sargent Wilson look alikes no less) made up my 500 point force.

As per the scenario guidelines, I split my force into two. Three units would start on the board, and three off. I chose to set up the MMG, and the forces of Walmington on Sea. This was nothing more, than it was fun and looked awesome, seeing the Home Guard platoon patrolling. 

Turn 1:

 The early dice pulled were mine, and I decided to wisely put the squads, off the board, down, waiting to see how Terry would launch his assault. Meanwhile, off the coast, the boat’s came in on my right of the table. Deny, the MMG set up on my left of the table, valuable targets. 

Don't panic
With the boats successfully beached, Terry ran his forces up the coastal force. His lead assault squad, charged forward, and into a volley of shots from the Home Guard squad. As he charged, forward, a German was shot down. However, in response the squads Assault rifles, let rip and three men were mowen down from the Home Guard. A passed order test later, and the squad was going nowhere. Over the battlefield, all could be heard was shouts of “Don’t Panic”

Elsewhere the MMG, despite it’s poor positioning, was able to see Terry’s other assault squad, and let rip adding a hit marker and another dead German. 
Ring the bells, the Germans are here

The turn came to an end with Sargent Wilson heading to the phone box, and the words “Would you  mind awfully sending some reinforcements please. The  Germans are here". 

Turn 2:

  We rolled to see if dawn broke, but the night was still young. Terry, took the early dice and his assault squad and sabotage squad advance forward, pouring fire into the Home Guard squad. However, a combination of going down, cover, and poor dice rolling kept them alive, for another turn.

My first dice of the turn was pulled, and I tired to bring on a squad of the board, but I Fubar’d with a double 6. The squad was going nowhere, a blow to my plan. Meanwhile, my other two squads came on successfully, and ran forward to engage with the Germans that had appeared on the Right hand side.
Jones did not like it up him.

Turn 3:
Taking the first dice, Terry charged his assault squad over the hedge and into combat with the last two men of the home guard squad. It was inevitable, and despite shouts of they don’t like it up them, they were wiped out, earning Terry.

Meanwhile Terry moved two of his sabotage squads towards the edge of the house. Meanwhile, in the battle of the field, Terry’s squad had advanced towards the house, and into the line of fire of one of my squads later, they were still alive. But down to two men, and heavily pinned. 

Good news for me, saw the third squad advance on to the board, and in what will be a moment of tactical brilliance (what joy hindsight is) I advance them down the right hand side of the cottage, knowing that I might not be able to stop Terry getting to the cottage, but I can then charge them with a full squad. 

I was going to move my second squad forward, however it ended up under heavy fire, and losing four men. Even advancing my captain to help, reduce the pin markers, didn’t help. 

The final man, from Terry’s assault squad was cut down by the MMG.

Turn 4:
The dark was starting to get lighter, but the sun was still a long way off. 

Fix bayonets, and charge. 
Things started well for Terry, and he was able to get the first of his sabotage squads into contact with the building. A quick read of the rules for demolition charges (found in Operation Sealion, just don’t ask me to pronounce them) and I could breathe, he had to be in base contact at the start of the turn. 

The next dice was mine, and the saboteur life was cut short under a hail of fire. Meanwhile, Terry, moved his two remaining saboteurs squads towards the cottage. Along, with the lieutenant, and the final squad. 

Turn 5:
Finally, the sun rose, revealing the true extant of the danger to the British forces, the saboteurs were lighting the fuse. It went off with a huge bang, but the building stood firm. 
It's not going to end well for the Germans.

To counter this, the third squad charged the saboteurs and wiped them out. They decided, to stay put, causing a nice blockage between Terry’s third, and final sabotuers squad. 

Their was an exchange of fire, between the first squd, and Terry’s final assault squad, but with little result. The final action of the turn, was to see if the second squad, missing 4 men, and having four pin markers would do anything, and they decided to hunker down for a cup of tea, behind the hedge.

As turn 5 came to a close, we rolled to see if there would be a final turn. With a roll of a two,

Final score.

David 9 Terry 1

It does sound a very comprehensive drubbing of the german forces, however, there were two moments where I though the game had been lost. The first was when my squad, on turn 2, decided not to turn up. However, the fact they came in on the next turn, allowed me to send them in a different direction, that I would have done and I think helped me win the game.

The second moment, was when Terry detonated the bomb, trying to bring down the building. If he had been successful, he would have gain 5 victory, points, and I would have lost 3, making it a 6-6 and a draw. 

However, I’ve won, and I’ve gained 3 campaign points. Now, time to decide what German forces I want to use. 

Monday, 17 September 2018

Pelennor, an update

I'm done, finally....
So my life has been crazy for the last few weeks, however, I have been able to finish my Fell Beast mounted Ringwraith off. Here he is in his painted goodness:) 

So one down, and only another 5 to go. Oh well, on we go, or the battle for Pelennor Fields will never go. I’m actually a bit on a painting break as I need to get some basing done, which is never my favourite task, but once it’s done, it’s done and the models do look better because of it. 

There has been some movement forwards on the battle for Pelennor Fields project. We’ve been talking about unit sizes. We’ve agreed quite easily that infantry, as a whole will be sixteen strong and will be shown as two ranks of 8 models. This is because we’ve got a lot of War of the Rings trays (two ranks of 4) and our historical gaming has seen us use units of sixteen models quite a lot. 

There is one exception to this, which is the units of normal Orcs and Goblins. For this, we are going to go with units of 32 models. This is because Tolkien’s describes Orcs as cowardly types who fight better in bigger units. So units of 32 models seem to fit this. We’ve also had experience of this, again from the historical games, where units of Celts come in at 32, a nice warband. 

However, I’ve decided for Uruk Hai, Morannon Orcs and the Lovely Black Guard of Barad Dur (Which are pretty much Uruk Hai) I feel, that as there bred for war, or to be better than an Orc, that these can be used in units of 16, to differentiate between the class. 

They don't match, and can't be right
way up when you take a photo
I’m going to pause at this point, to talk about weaponry. GW, in the Middle Earth SBG, have given the option for individual warrior(s) to be equipped with individual weapons. So you can have two orcs with bows, four with hand weapon and shields, two with two-handed axes, and four with spears, as an example (which is also what you get on an individual sprue of plastic orcs) 

As I want a smooth game, without a lot of consulting about what each unit is equipped with, I’ve condensed infantry into two types. Bow armed, and everything else. This should make it nice and easy. Yes, for the visual look, I’ll add the spear-armed models, to be behind the hand weapon armed models, but it’ll have no impact on the game. 

However, cavalry units have been a bit more problematic. My original thinking was to go with units of six models, however, when they get into combat, as you can see from the photo to the left, it shows that the unit is wider than the infantry models. Which is a bit annoying.

Matching, and the next thing on my painting table.
So after some discussion, it was proposed to go cavalry units of eight models. Four wide, and two deep. This is great as the units match up with each, and gives us the chance to get more models on the board without the hassle of trying to match up units. 

In other news, I’m now the owner of the Battle for Pelennor Fields box sets, and frankly, it’s an awesome set, and I can’t wait to build, paint and play with the models inside. I’m not going to do a full review, as others have done it, and anyway I’m not great at reviewing. 

I’ve also picked up the Armies of the LOTR which is the book that contains all of the profiles for models that appear in the LOTR. There is another planned for models from the Hobbit shortly. In this book is a number of scenarios that play out some of the key battles, including Pelennor fields, which has given me some ideas for the scenario.

See you soon.

Tuesday, 4 September 2018

Dragons of a Middlehammer age.

So, my life has taken a little bit of a left turn in the last few weeks or so, but despite the hardships, I’ve been able to paint 35 models in four days. It’s the nice thing about Bolt Action, and historical wargaming in general, is that the models don’t have a lot of additional extras sculpted on, except maybe ECW musketeers, and so you can paint them up real quick. It’s also helped the painting figures for the year.
Please, paint me....
Anyway, as I paint my Fell Beast mounted ringwraith, and yes work is proceeding on that, I’ve pulled down this chappy. It’s the old Wood Elf Lord mounted on Dragon model. It was first released in 1995/ 1996 and it was the first Games Workshop model I ever saw, back in 1996, and it was the model that drew me into the Games Workshop, and later the wider wargaming, scene. 
I finally bought a copy of the model in September 2011, and he came prebuilt, which is great, as I don’t enjoy pinning models, and has sat like that ever since. I’ve always loved the GW dragons from my youth. I already own the original Prince Imirk on Dragon, again released in the 90’s and I’ve added a few more since then. Mainly, the Plastic High Elf Dragon and the Lord of the Rings Dragon and Smaug.
Image result for Wood Elf lord on Dragon
Old school


I'm not going to paint him in the traditional colours, as seen to the left. I've started a Wood Elf force a few years ago, consisting of Archers, and Glade Riders on the advice of a friend. He could do wonders with the army. I didn't have the same ability to win as he did. 

The colour scheme I've chosen in a winter themed, and so the dragon is going to match that. Possibly a grey white body, and dark grey or pale blue scales. We'll see when we get to the painting stage, which is going to be a while as I've got to rebuild him, again.
So, why am I talking about dragons, well obviously, there cool, but thanks to the Games Workshop Made to Order range, I’ve added four more dragons to my collection. They are Zacharias the Everling, the 2001 version of Prince Imrik, the Sister of Twilight and Malekith on Dragon. 
And this has got me thinking, is it possible to get all of the GW dragons. Now I would love the original Chicken Dragon and the great spined dragon, but they go for a lot on eBay, more than I’m willing to pay for. So I’ve decided to get all of the Dragons released from, or were available when I started playing in 1996.
So the Dragons that were available, thanks to the catalogs on So Legends are.
High Elves
Prince Imrik (got)
Wood Elves Lord on Dragon (got)

Orcs and Goblins
Azhag the Slaughter

Chaos
Egrim Von Horstmann

Undead
Liche on Zombie Dragon

Dark Elves
Rakarth on Dragon

So, I’ve got two out of the 6 models available when I started playing. It’s a good start, 33% of the way there. I’m also going to add in this model, Thaindon, Elf lord of Caledor, if I can get hold of him. He was in the back pages of my 4th edition High Elf Army book, and so I feel that if I can get him, for a good price, I’ll get him. 


So, what releases since then do I need to get

Image result for Dark Elf Dragon box
One of the best models out there
High Elves
Prince Imrik (got)
High Elf Sorcerer on Dragon
Plastic Prince Imrik, though never formerly published, you can make an Imrik out of the plastic kit

Wood Elves 
Sisters of Twilight (got)

Orcs and Goblins
Orc Warlord on Wyvern (got)
Azhag the Slaughter
 Chaos
Galruuch

Undead
Zacharias the Everliving (got)
Terrorgiest
Vampire lord on Dragon 

Dark Elves
Malekith (Got)
Dark Elf Lord on Dragon
Dark Elf Sorceress on Dragon

So, this is another 13 models, of which 5 have already been purchased. 38% models I now own. So that means, I’ve got to purchase 14 more models. 

I’m also going to add in three models that they’ve made for Age of Simar. Archaon, on his demonic mount. Though, not a Dragon as such, it’s an awesome model. The Stormcast Star Drake and the Maw Crusha.

So actually 17 models. 

Oh well, off to the painting table we go.