Monday, 20 January 2020

New Year, 2020

New year, new armies.
Over Christmas, I played my first game of Age of Sigmar, using the recently released Ossiarch Bonereapers. When these were previewed, I fell in love with them, and so as soon as they were released, I brought myself the Feast of Bones boxset, getting myself a good core of an army. I then purchased a Liege Kaveos and some more Mortek Guard.

The legion begins
I really liked the design of the Bonereapers. They reminded me of the Tomb Kings from the World that Was. I loved the idea that they are all constructs and they are unstoppable. The background to them is my favourite of all the new armies GW have released, and despite the fact there a pain to build, they are good looking. 
I don’t have any photos of the game. Jim brought Ogres to the table and massacred me. It was his first game, and my first for a long time, and it was good. I learnt that Necropolis Stalkers are good in combat. Their multi face rule is really good, I used it to do a serious amount of damage to Jim’s big Thundertusk. However, I made my favourite play, making mistakes, and ultimately lost the game. 

So, my next purchases are some more Necropolis Stalkers. These are good, and I want a unit of 3, on each flank. I also want another 10 Mortek Guard to bulk out the unit that came in the Feast of Bones boxset. I also want a third unit, most likely armed with spears, as I think this would be a good purchase. Following, that I’m not sure what next. One of the Harvesters would be nice, as they are awesome models as well as some Deathsriders as the models are fun. 
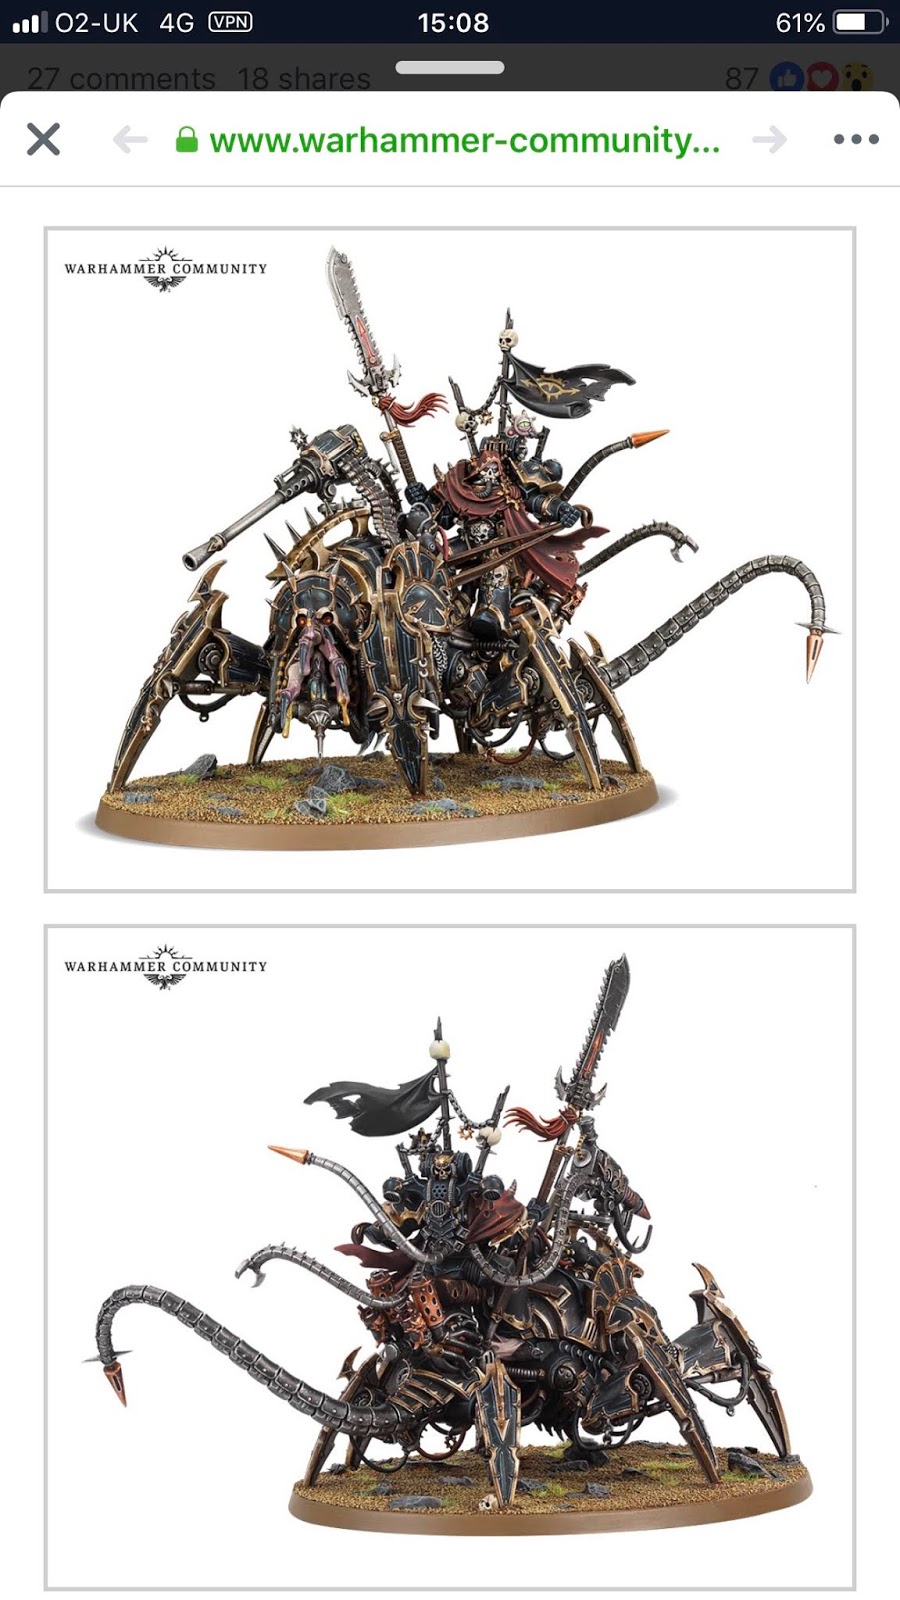
Copyright Games Workshop.
Also, I want one.
Then following the AoS trend, I’m going to get a new 40k arms as well. Jim is also up for playing 40K again, and with the release of the new Sisters of Battle in plastic, he will be growing the size of his Imperial Guard army. 
Which leaves me with a choice. What army to go for. It’s either Eldar or Chaos Space Marines. I’m
still undecided about which one to go. I’m liking the look of the Eldar at the moment, with the recent blood of the phoenix Physic awakening book and the plastic Howling Banshee’s these are a possibility.
However, I’ve always wanted to do a Chaos Space Marine army, and with the release of the amazing new Abaddon model last year, I’m thinking this is the army for me. I’m tempted to see if I can do it at cross purposes. I also want to do a Horus Heresy Army as well. I could use the plastic mark 3 and 4 armour designs to make myself a force that is compatible for two games. 
I’m thinking of either a Night Lord Force or Alpha Legion. That’ll will be another blog post.
Other projects I have on this year, I’ve already mentioned the Desert War in a previous post, and I’m busy painting Italians, Germans and British for that campaign. I brought myself into the kickstarter for Barons War run by Andy Hobday of Footsore Miniatures. I brought myself enough for a small Lion Rampant force with the following units
1 unit of 6 Mounted men at arms]
2 units of 12 men at arms
1 unit of 12 archers
1 unit of spearmen. 
And a trebuchet. 
Plus a variety of commanders such as William Marshall, and I’m good to go. I would like another unit of spearmen and archers, but will have to wait for them to come available again. 
I also want to add to the Mortal Gods unit’s that I’ve got and I’m looking forward to the mythic expansion hitting Kickstarter soon. I’ve got some Wood Elves for Warhammer to paint, which will make a nice change from all the other painting.  More Harry Potter models, and Star Wars Legion. Let alone all the other historical stuff to paint. 
Plus, a variety of Lord of the Rings stuff, which I’ll tease you with here, which will keep me busy for the following year(s) to come. I just hope that I can paint a lot more than I purchase this year. 

Tuesday, 14 January 2020

We're all going on a desert holiday.

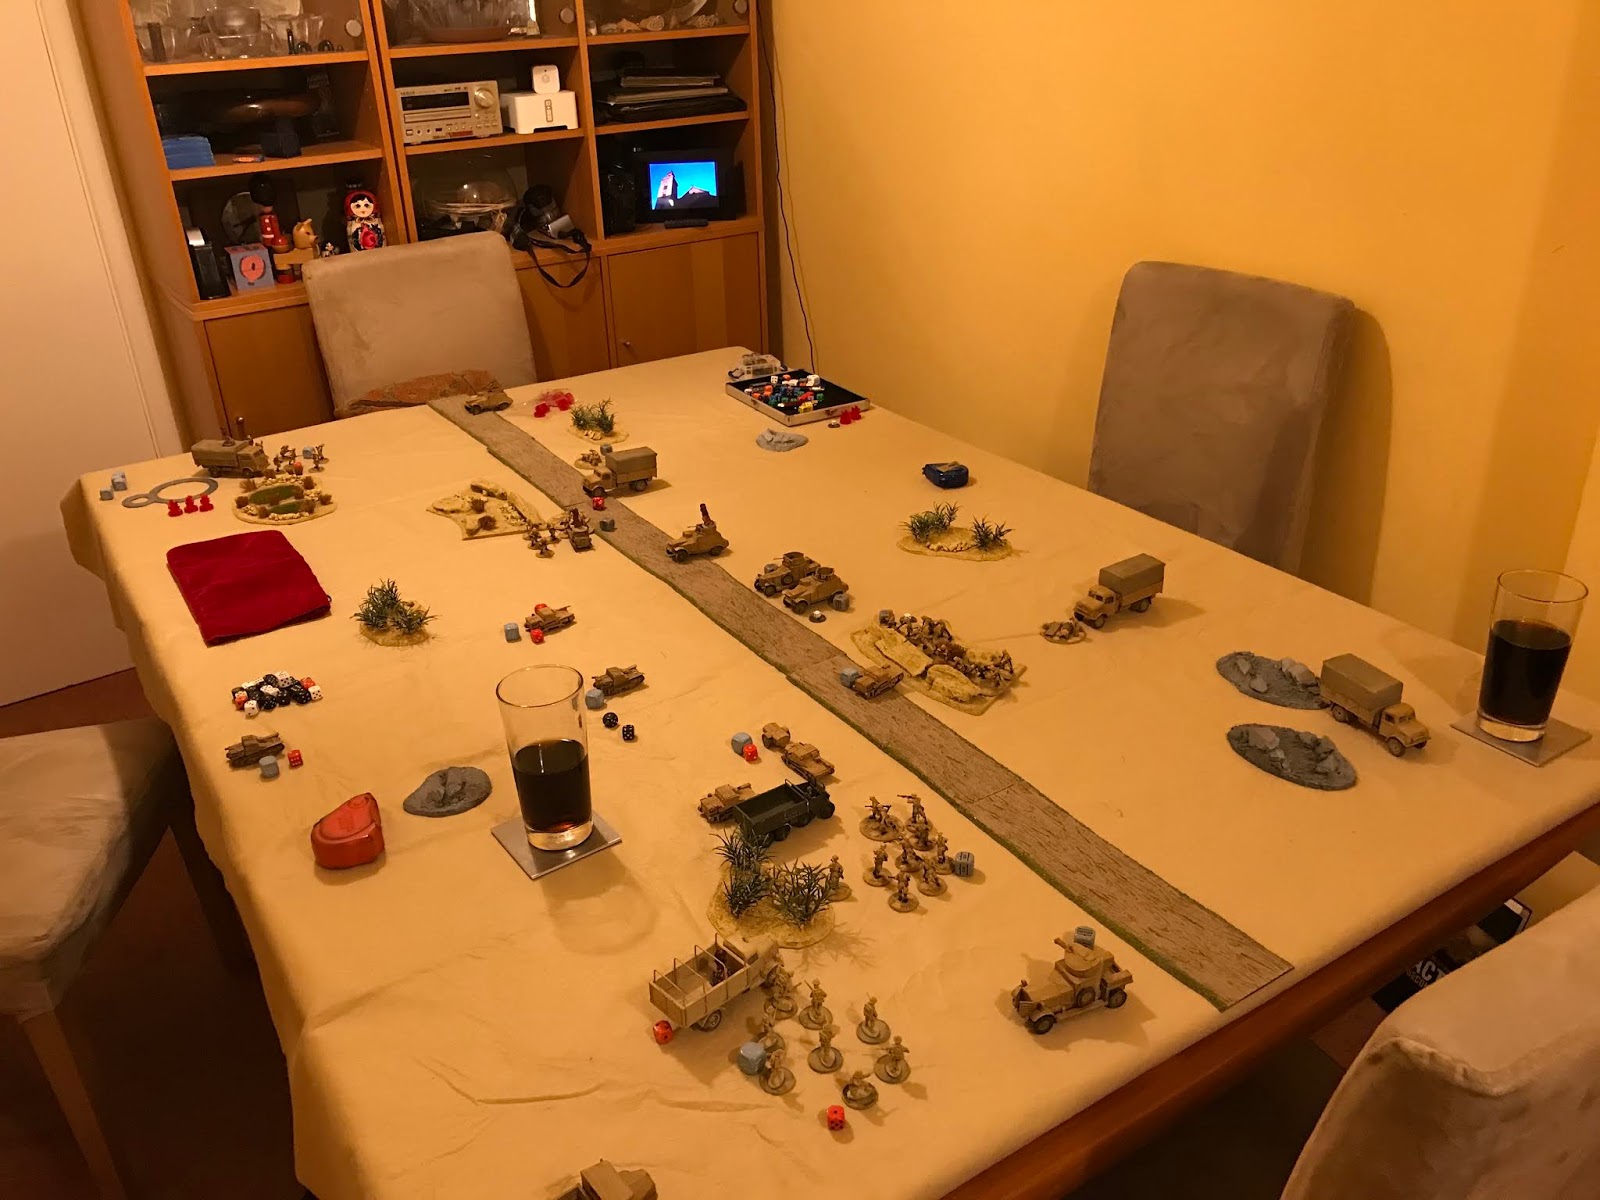
The table mid game.
So, after an extensive year of playing through Operation Sealion, Terry and I have moved to the Desert, and we are going to be working through the Bolt Action Western Desert campaign book. This has seen my investment in two new forces, Desert British and Italians, with plans for a third. Desert Germans. It’s also seen my knowledge in different tanks increases and I build and paint, lots, and I mean lots. 
We’ve also got plans for a big game later in the year, which will see us have a big table and a lot of tanks. But that’s another blog.
So, the other night, we got our toys out and played through the first scenario. I started out with the Italians, and I brought a force of seven CV 33’s Tankettes. One with an Anti-tank rifle and another with a flamethrower. This was backed up with three squads, in trucks, to take on any infantry or a glorious charge against vehicles.
This game would be using several of the Desert Rules, such as tanks getting double pin markers as sand get’s everywhere, which are found in the Western Desert book and night fighting. Using these rules were a first for both of us. 


Turn 1:
As the flare went up, and the enemy spotted, we raced forward. Terry got the majority of his troops on to the board first. I was soon facing a number of Humber CS9’s and Rolls Royce’s, with squads hiding in the back of trucks, with a lone Tankette. 

However, it managed to survive a number of incoming shots. In fact, it wasn’t until the middle of the turn was Terry able to kill something, blowing up a recently arrived truck on my left flank. Worse, as the squad bailed, a number died as they exited. 

I took my return and wiped out one his light mortar. The game came to an end and the next turn, would be in darkness.

Turn 2: 
With reduced visibility from the darkness, this was a turn of manoeuvring, and very little shooting. My anti-tank gun armed Tankette was able to take out one of Terry’s Humbers which had strayed a little to close. 

However, his advancing Rolls armed with a gatling machine gun was able to take out another of the trucks causing damage on the squad as they bailed out. 

In the Centre of the table my final squad advanced towards Terry’s squad in the rock pile but was unable to do further damage. The turn ended with a flare going off, ending the night. 

Turn 3:
On the right flank, Terry’s squad that was pinning my squad in the burning building. My tankette advance up behind them, and opened fire, with the machine Gun. I was able to kill a number of the squad, but they were going nowhere.

On the left flank, Terry’s squad charged into my squad, and wiped them out in one round of combat. Ouch. However, there was a surprise as my flamethrower armed Tankette rumbled up and failed to hit. It would have been so good. 

My turn got ever worse, as Terry’s squad recovered from being shot at, and charged the Tankette in return, destroying it in a hail of hits. Things had turned towards Terry.

please hit.....
Turn 4:
The flare barrage continued and once again, and I needed to do something with the squad on the left flank, I had decided to charge the Gatling mounted Humber with a squad, hoping to replicate Terry’s success of the previous turn. However, they failed the moral check, and decided to go down behind a sand dune instead. 

In the previous turn, I had reversed a truck out of the way, so that I could now manoeuvre a machine gun armed tankette into point blank range, which caused Terry to go down, despite this I did a number of hits, which saw me decide to manoeuvre the flame thrower armed tankette at another squad nearby, who were hiding in a rock pile.

I rolled a 1 again. This was why I brought a flamethrower, but no joy.

In the centre of the table, Terry and I traded pin markers, and on the right flank my command Tankette charged forward, and began to whittle down the squad that caused my tankette to be destroyed in combat. 

The flares came down and night descended again.

Turn 5:
With reducded visibility, I decided to open fire with the flamethrower, and this time it hit, and killed a two of Terry’s troops. Thankfully vehicles get a +1 when rolling to hit, but still 2 dead.

However things, swung back in my balance as I had inflicted 4 pin markers on Terry, and the squad ran off, having seen two of their number become human torches. My command tank also paid off the remaining squad with it’s machine gun, killing three of their number, and the final chap running off. 

On the left flank, after having rallied in the last turn, my squad over there moved forward, and killed one of the MMG, which had failed to spot them coming. 

Meanwhile on the right flank, through bad dice rolling, and me failing my morale check, Terry’s squad was left wounded, but still in the fight. Thankfully, the Humber couldn’t see anything. 

However, breaking from the centre of the table, one of Terry’s Humber broke through a Tankette, and could see the flamethrower mounted Tankette. The final action of my turn was to attempt to move a Tankette that had spent the last three turns retreating, after failing morale checks, this time I passed and moved on the attack, adding some pins to the 

The turn ended with the flares coming on again.

Turn 6:
The first dice went to Terry, and he took aim at the Flamethrower, damaging it, but not destroying it. It was going anywhere, but it could still shoot. Annoyingly, however, it would only shoot to the front, and there was nothing in it’s line of sight.

Choosing the better of two evils, and having already shot at it, with a machine gun, my remnants of a squad charged Terry’s squad and wiped it out.

In the Centre, Terry poured a lot of fire into my tank but was not able to destroy it, he added a lot of pins, which I then duley retunred. 

As the turn came to an end, Terry was marginally in the lead. Another turn, was rolled for and the dice showed that we had one more turn to play.

Turn 7:
Victory.
I pulled the first dice and it was mine. On my left, I shot at the Machine Gun team infront of my squad and wiped it out. We were even on victory points, I reached for another order die, and it was mine.

On the right, my squad charged forward, taking on the Humber CS9, that had immobilized the nearby flamethrower armed Tankette. As it was opened topped, I didn’t have to check for tiger fear, and wiped the vehicle out. I was now winning. 

Terry, then poured a number of anti tank shots into my Tankette at point blank range, but despite getting a dangerous number of pins, they were still moving around. The Machine gun armed Humber inflicted some more damage on my squad, but the game had come to an end and I had won.

David 14 victory points
Terry 12 victory points

So, that was a lot of fun. I like playing with tanks. Tanks are fun, and the CV33’s in this sort of scenario, where it’s mainly armored vehicles or very, very light tanks, is a lot of fun and I will be investing in a flamethrower mounted CV asap. I do think I was very lucky, we had the seventh turn, which was followed by the first two action dice, which allowed me to take out two more of Terry’s units which gave me the win. I was also fortunate, that Terry rolled poorly and didn’t take out any further vehicles or troops in the last turn. But it was a good, fun start, and I’m looking forward to taking on the Italians as the Brits.

The Russians are coming


So new year, and we’ve already got our first big game. It’s the battle of Durnstein. It took place in November 1805 and is a battle where the French forces fought the Russians. So this gives me a chance to play the Russians in Black Powder and, despite owning it for a year, give the updated Black Powder 2 Rules a bash. 
You can find out more, at this blog, which is a fantastic read http://obscurebattles.blogspot.com/2013/04/durnstein-1805.html
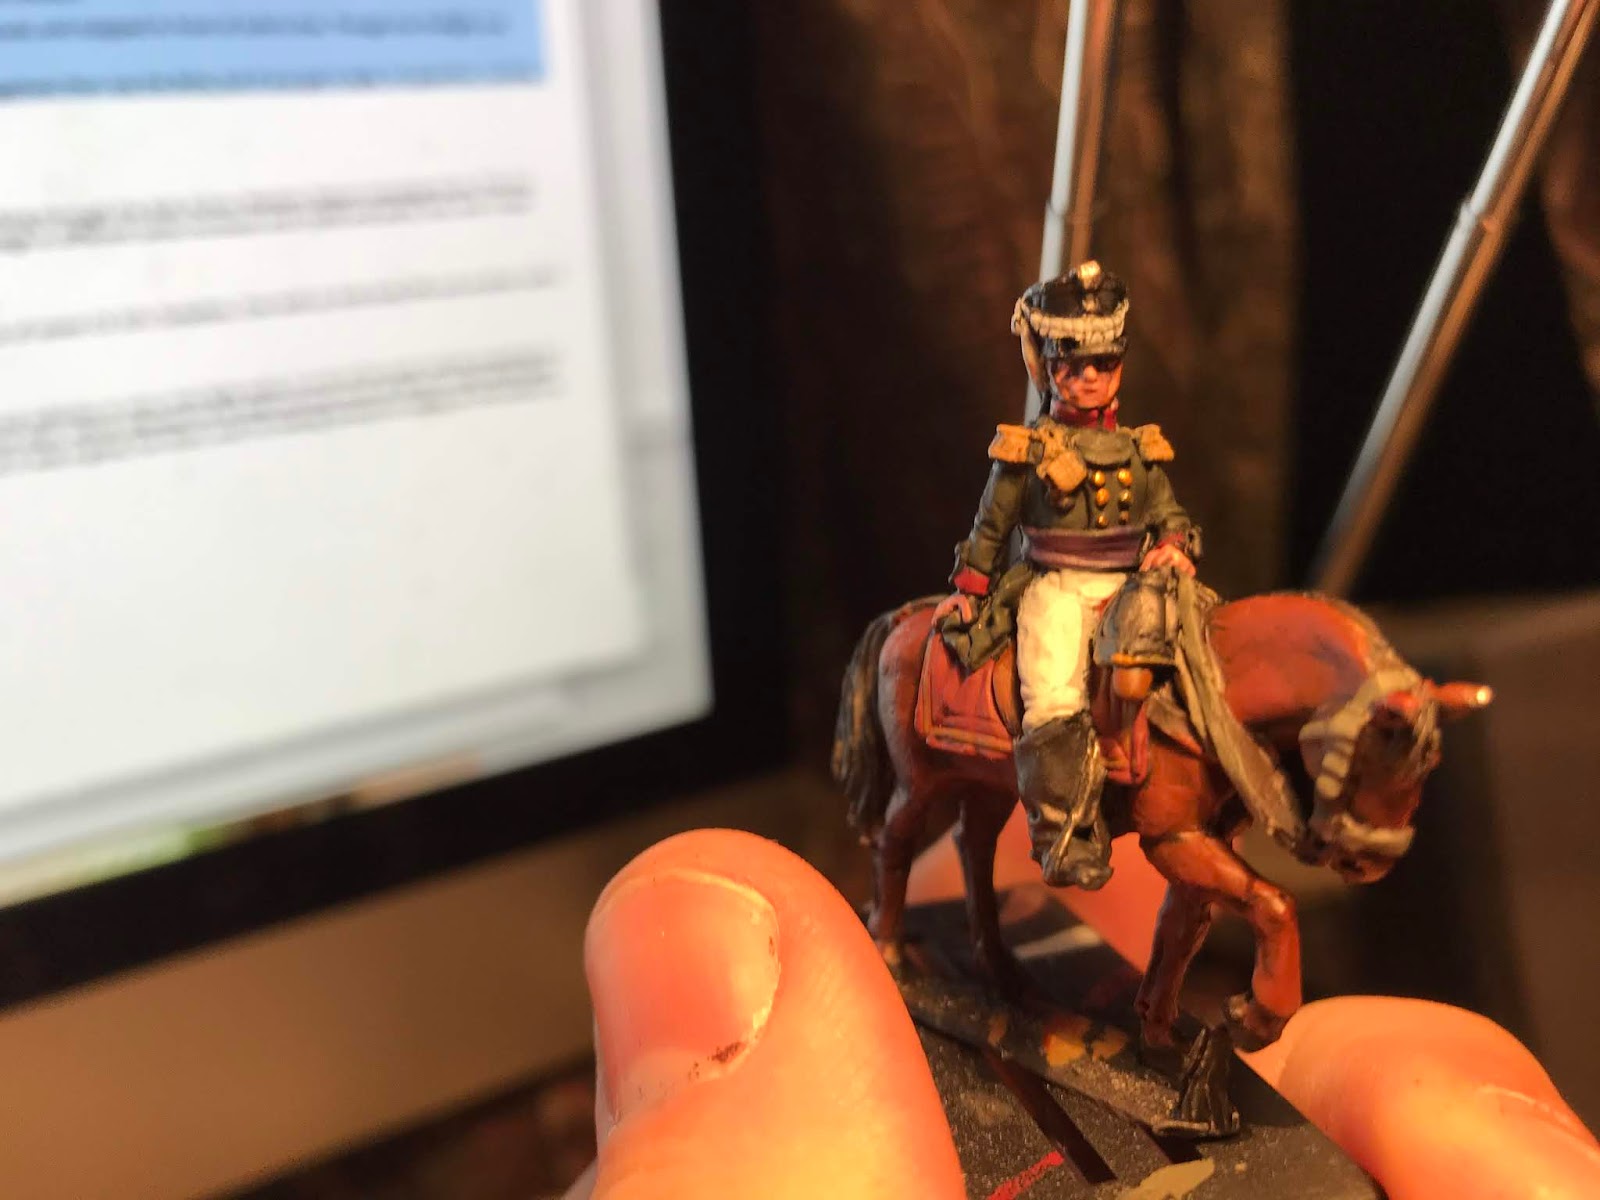
In terms of painting, I’ve only had to do a few things. Firstly, I’ve had to paint of officer to lead a division/brigade/army (I can never get the titles right) and 3 12 pounder cannons. Not a heavy painting load, but I did paint a regiment prior to Christmas. 
To help us play the game as smoothly as possible, and to know how Russians play in a game of Black Powder, we are playing a few games on Wednesday night to get use to it. 
John and I each had a division with a few Line Regiments and some cannons. John also had some Cavalry, forming the third division. Facing this, was a similar number of French. I was opposite Terry, and things went very well for me. I was able to advance forward and met Terry in combat. Shooting, is not Russian strongpoint, hitting on 5. However, combat, especially with a charge, and a free re-roll on the first turn of combat is a lot more fun, and though despite one of my regiments becoming shaken, I was able to see of Terry and break his division. 
I then turned to advance towards Jim, and to help John out. However, in a rash move on the first turn, Jim moved forward three full moves and stopped in front of John’s line. Though the firefight and combat were protracted John then got the upper hand and the battle was ours.
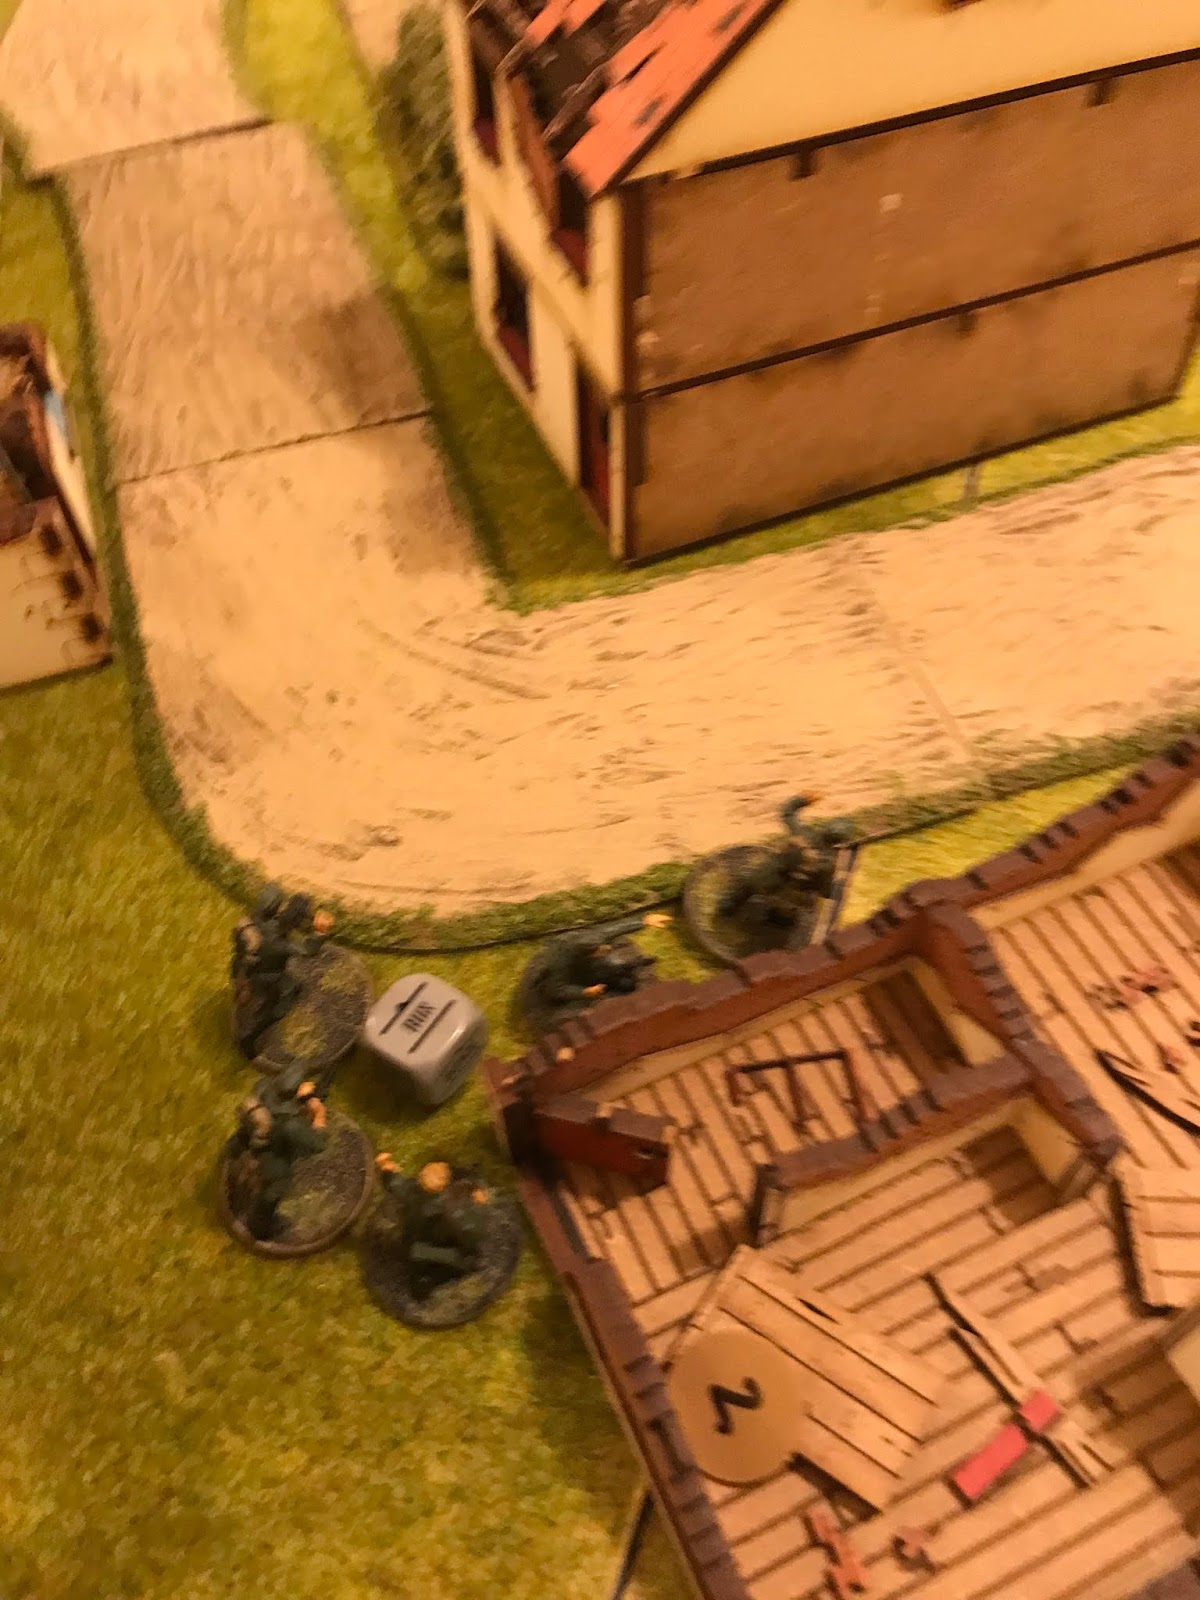
I only took one photo, which I hope you enjoy, but the game was fun. The Russians are a bit harder to play with as they have more negatives than say the Brits, but if you get it right, it’s good fun. Looking forward to playing the next battle on Wednesday.

I'll finish with a couple of tip progress pics of some Russians I'm working on for the big game.


Sunday, 16 June 2019

Luftwaffe Down: Take 2

So, after playing this scenario through the first time, and as it was a one-sided affair, Terry and I decided to make some adjustments to the scenario to make it more fun, and hopefully less one side.  I posted our thoughts in the previous post, but we've made a few more changes since then, and so here is the updated list.

Searching The Village:

The German aircrew are hidden in one of six houses. The German player places a counter randomly numbered with one to six in each building. Roll a d6, whichever house has that number contains the German Aircrew. Until revealed the airmen cannot be given an order.

The British must pass an order test and spend a turn in the house they are searching (place a Down order on the unit) 


German units find the crew automatically on the turn they move within 3" of the right house.


Airmen Escaping 

As one of the airmen is wounded, the German airmen can normally only Advance. However, they may run if within 3" of a friendly unit. They must pass an order test to move even if they do not have any pin markers.

Winning the Game:

The game winner is whoever controls the film at the end of the game. 

Moving the film:

The captain recognises the value of the film he possesses and will not relinquish it to anybody, unless he is dead.

Victory Conditions:

Change to "... the British play wins id the German aircrew is destroyed and the German commandos have not recovered the film.

Campaign Points:

The British gain 3 points if they are in possession of the film at the end of the battle. They again 1 point if the ari men are dead, but the film hasn't been recovered. 

The Germans gain 3 points if they carry the film off the table, or 1 point if they have possession at the end. 


So, again, I took four squads of Home Guard, and one small squad of Veteran Home Guard led by an officer. Terry took some Brandenburg assault squads, out on the hunt. I split my force in two, one on either flank, hoping to sweep to the centre and find the aircrew.


 We began by rolling to determine which house the German Air Crew were hiding in, we rolled a dice and it was house number 1.


Turn 1:

The first dice pulled was mine, and I took the squad deployed on the left forward to the nearest house, hoping to find the Germans in there. I got the next dice and the Veterans advance forward along the road.

Terry got the next dice and brought on the first of his Brandenburg squads on the left flank. Whilst I then maneuvered the other squad on the left towards the center fo the board. Terry then got the next dice and brought on another squad.

I advanced another squad into the centre of the board, which was then matched by Terry bringing on his final squad towards the centre of the board. My officer moved to follow the veterans, whilst Terry's officer moved towards the centre of the table. The turn ended with the German aircrew doing their best to hide.


With the Germans using the disguise special rule, I was going to have to get close to see them, before I could then shoot at them. Turn 2, was going to be fun.


Turn 2:

I got the first dice of the turn, and the second squad on the left searched the nearest building. I flipped the counter, it was 3. The aircrew were not in that building. Terry, then moved the Brandenburg squad on the left, to the nearest house flipping the counter, revealing a six. Two houses down, and no sign of the aircrew.

Terry's squad on the flank moved forward to the nearest house and flipped the counter, it was a 5. Three houses down. I then moved my other squad on the left, towards the nearest house and looked at the Germans, but because of the disguise rule, they gave a polite nod of the head and went about their busisness.


Terry's squad in the centre, advanced forward, and knocked on the door of the nearest house, and asked in their best german if the aircrew were in there. The counter said 2, and it was now clear there were two houses left for them to be hiding in.


I then advanced one of the squads on the right forward, hoping to get the house in the next turn. Meanwhile, Terry's officer moved forward and came into contact with a house. The counter was flipped, it was a 1. The Aircrew had been found, who then fled. The turn came to an end with my officer and the other right flank squad running forward hoping to catch up.


I was going to have to pull something out of the bag in the next turn to win this.


Turn 3:

Terry got the first dice, and moved his officer backwards, linking up with the aircrew. I then advanced one of my squads forward, from the left flank, hoping to get a good line of sight and shoot them down.

However, the Brandenburg squad in the centre got in the way, and though I was able to kill four of their number, including the NCO, and causing an extra pin with my officer, they passed their test and stayed on the board.

The next dice would determine the game, if it was mine, I might be able to cause the aircrew to go down, and so bring up the other forces to stop them.


It was Terry's and the aircrew fled off the board.


Though this had the same result as the last game, and in a similar time frame, I didn't mind so much as the random element was more fun, and it was just bad luck, for me, that Terry was able to find the squad at the end of the turn.


So, only one thing to do. Swap sides and play the scenario the other way around.


Looking at the board set up, I wanted to try and cover the right flank, more than the left. So, I'd be bringing on two squads on that side, with the officer. Then use the final squad on the left as bait.


Game 2 and the aircrew were in house number 2.


Turn 1:

Terry got the first four dice, and so as there were no enemy on the board, he advanced forward three squads, plus the home guard veterans, hunting for aircrew. I then got the next two dice and deployed the commander and a squad of Brandenburgs on the right flank.

Terry then moved a squad through the gap in the middle of the table, and inbetween the ruins. I then geo the next few dice and I deployed the decoy squad on the left and brought in the final squad on the right, but a bit closer to the center than I should have done.


Terry's commander moved forward, rounding of the turn. Another quick turn, but forces were near houses and so it wouldn't be long before the German Aircrew was found.


Turn 2:

I got the first dice of the turn, and the decoy squad on the left moved forward and searched through the house. It was a 4, and so the air crew were still to find. I then moved my squad nearer the centre to a house, flipped the counter.

It was a 2.


I had found them on the second dice of the turn, it was going to be a different game. Seeing the aircrew appear, Terry advanced forward his squad on the left flank and opened fire on the nearby Brandenburg squad. He hit twice, but no casulties were caused.  He then ran forward two squads, getting them as close to the enemy as possible.


Seeing the enemy approach, the officer ordered the other nearby Brandenburg squad forward and to open fire. The key was to get the aircrew out, everyone else was expendable. Not knowing this, they surged forward and killed two of Terry's second squad on the right.

Terry's veterans then advanced on the decoy Brandenburg squad. Terry's officer advanced forward, and I responded by my officer advancing forward and killing a further four of Terry's squad that had already been hit. Terry was then able to pass his moral test.


Speaking of Moral Tests. I got the next dice, and it was time to move the airmen crew, as per the special rules, I had to pass a morale test before they could move.


I failed and they went down. This was not going to be a quick game.


Terry then advanced his final squad towards the enemy. I was going to have to go on the offensive on the next turn if I was going to get the airmen out alive.


Turn 3:

I got the first dice of the turn and advance my squad in the centre forward, ending near the airmen. I opened fire and killed six of the nearest squad. Terry failed his morale test, much to my pleasure. Terry then tried to charge his wounded squad, but failed the moral test. On the left flank, the decoy squad spotted a target and killed six of there number. However, Terry was able to pass his moral test.

I moved the squad on the right, towards the hedge and opened fire. I killed six of the squad, but again Terry was able to pass his moral test. Terry then advanced a squad towards the airmen and opened fire, but due to them being in the building still, they were fine. Terry then tried to move the squad on the left forward, and this time failed his morale test.

I moved my officer towards the airmen and with a quick order in German, the airman began their move towards the nearest table edge. Terry then tried to advance his final large squad, but they decided to go down.


Finally, his veterans charged into combat with the decoy squad. He killed four, and I killed none. WHAT!

That shouldn't have happened. As we both love a good narrative, we both agreed that the squad was not killed, but captured for a good interrogation. He then advanced them forward five inches.

I had gone on the offensive, but that last act by Terry could have swung the game in his favour.


Turn 4:
I got the first dice, and as my airmen were still near a friendly unit, they made their way to the nearest board edge. I got the following dice, and charged my squad in the centre into combat with Terry's commander, and killed seven out of the three men with no loss in return.

Terry's squad on the right tried to advance, but failed his order test, and so went down instead. The same happened in the centre, and his squad went down instead of charging my squad in the centre of the board. Finally, Terry then moved the Home Guard veterans forward.

I got the next dice, and the officer, and his men, fell back to make sure the Aircrew escaped with the film. Terry then tried to charge in against my squad in the centre. He was able to kill one, but I was able to hack four down in return, and wiped out the squad.


On the right, I charged the squad over the hedge, and killed five suffering no loss. I was able to consolidate a mighty one inch.


So, this turn went okay, and as long as I get the next dice, the airmen are off the board.


Turn 5:

Terry gets the first dice and the Home Guard veterans charge into combat with the aircrew. Not good, but as they were over six inches away, I could shoot. Doing so, saw three of them die before making it into combat.

Terry, was able to kill one of the aircrew, but I then wiped out the remaining members of the squad, and consolidated of the board for an easy win.


So, identical results, the Germans got the film, but two very different game. Yes, the first game was similar to when we played the scenario with the rules as written, but it was more fun, as you didn't know which house the Germans were in. It was just unfortuante that it was near the end of the turn when they were revealed.


So, another three campaign points to Terry and myself. Next up a 1000 points capture a port game.


Tuesday, 4 June 2019

Back to School, oh what a magical time


So, I'm going to start blogging more, and we'll see how this goes. But, I'm going to show off what I've been painting and as it's now June, expect a few state of the patining projects to appear. So, what have I painted recently?

A while back, I was able to pick up the Harry Potter-Miniature Adventure Game by Knight Models. This was due to a serious of Amazon vouchers from work. When the game was announced, I was intrigued, I'm part of the Harry Potter generation, however, when the game was released the high cost of the starter set and models put me off.

It's amazing how things change when you get a bunch of Amazon vouchers. So, having owned the set for a few months, and not the customary years as a lot of models get owned for I've begun to paint them up


Firstly, on the right, we've got Ron Weasley. I do love the pose and the sculpt. It has the sort of relaxed attitude and carefree lifestyle that Ron has in the books. I patined him in the traditional Gryffindor school robes.  I love all of the scuplts, especially the limited Voldemort, but they suffer from something quite serious.

They are made from a type of resin, different from the Finecast from Games Workshop, which allows them to cast quite delicate parts, like wands. Which break very, very easily. I've snapped both Ron and Hermione's wand and ask you can see from the Death Eaters below, I've not snapped a wand but now lost the end.


The Death Eaters were okay to paint, lots of black, and dark colours, with some nice spot colours in the metal mask, the flesh and the wands. Up next on the painting table are Hermonie and Harry.

Sunday, 12 May 2019

Find them, find them all

For the next scenario in our Sea Lion campain, Terry and I were hunting for a downed German aircrew, holding secret film of the local area. I, playing the British, had to stop the Germans at all cost. While Terry had to get the film of the board.

To do this, I took four ten man squads of Home Guard. One was regular, and the rest inexpereinced. I took a half size five man home guard squad, giving me another change to use the Dad's Army models, and then an officer and his man.

Here goes,

Turn 1:
 With six dice in the bag, I was able to get the first dice, and rushed my Dad's army squad forward. I had put two squads on the left, and two on the right. Not knowing where Terry would come in on, I was going to move forward, surround the house with the aircrew and defend for dear life.

Terry got the next dice, and brought on his first squad. In fact this whole turen, was Terry and I moving towards the centre of the table, and towards the waiting airmen.

Turn 2:
I got the first two dice of this turn, and moved my squad up the right and towards the house. On the left flank, one of my ten man squad and the dads army unit moved forward and advaced into Cover.

Terry, the got the next dice and moved his officer, and two of the nearby squads forward. He was even able to open fire with one of his squads killing one of the squad on the road. Worse, it took out the LMG.

I then moved my officer forward, and then Terry, moved his squad forward and into contact with the house activating the airmen, and thier escape plan. The turn came to an end with the German airmen legging it.

At this point, it was obvious to both Terry and I that he was going to win. We reread the scenario and we noticed that if the unit was not with 3" of a squad it wouldn't move. So, there was a chance.

Turn 3:
Taking the first dice, I advanced the squad on the road forward and into combat with the squad near the house. I killed one of Terry's men. Terry in response, killed 8. I had one man left, who ran away.

On the left flank, I opened fire on Terry's second squad, sitting near the field, with two of my squads. I was able to kill four out of the six man squad, but the remaining men passed their morale test, and returned fire but did no damage as they decided to go down.

Meanwhile, the airmen carried on thier retreat and, taking Terry's officer with them, they got towards the edge of the board.

Meanwhile Terry then shot at my officer, killing both of them and then turned on the Dad's Army Squad killing four. Jones failed his test, and ran off.

Turn 4:
Terry got the first dice, and the airmen fled off the baord and the game was over.

This, was very dissapointing. We had read the scenario several times during the day, and during the game, and depsite spotting the typos, of which there were a lot, we could not work out how the British could win this scenario.

Our only idea was for the British to take a vehicle or two, which is going to be pricey in a 500 point force and run forward in the first turn to the other side of the German hideout, and defend for dear life.

Feeling somewhat unsatisfied with a game that was less than a hour long, we decided to change the scenario.

This time, we've added the following.

Which house has the Germans in?

  • The German aircrew are in one of six houses. Hiding. Place a counter, randomly, with one to six in each building. Roll a d6, whichever house has that number contains the Germans.
  • If you're British, you must spend a turn in the house searching
  • Germans find the crew on the turn they move into the right house
  • As one of the men is wounded, the German airforce men can only move 6" a turn
  • The game winner is whoever controls the film at the end of the game
We'll let you know how it turns out.

In the skies

So, Warhammer Fest has come to a close after two days at the Richo Arena, though I was not present to see all of it, one of the videos appearing on Warhammer Community was this.

Yep, GW are bringing back Aeronautica Imperialus. I played this game a lot, back in the day. I had a few Eldar ship and then a few years ago I bought a large number of Ork planes, that never got painted. 

Now I have a reason to .